
Managing content can feel like juggling flaming torches, especially when you're trying to keep a consistent publishing schedule across blogs, news updates, or product announcements. That’s where Flotiq’s Publication Scheduling feature steps in to save the day. Whether you're planning posts weeks in advance or just want to avoid the midnight publishing scramble, this tool helps you stay organized, timely, and stress-free. Let’s walk through how it works, why it matters, and how to make the most of it.


Dalia Bachmatiuk is a Frontend Developer at Flotiq. Holding an engineering degree in Biomedical Engineering with a specialization in Medical Informatics. Beyond her work in web development, she is passionate about aerial arts - including silks, hoops, and pole dance. She also enjoys crocheting and is an enthusiastic gamer, especially fond of platformers and roguelike games.

Let’s face it, manually publishing content can be a hassle. Whether it’s waking up at 3 a.m. to hit “publish” or dragging your laptop on vacation just to keep your blog alive, it’s not exactly the dream workflow.
With Flotiq, your editorial calendar runs like clockwork, even when you’re off the grid or deep in dreamland. It’s like having a publishing assistant who never takes a break and always shows up on time.
Using publication scheduling in Flotiq is straightforward. Here’s a quick walkthrough:
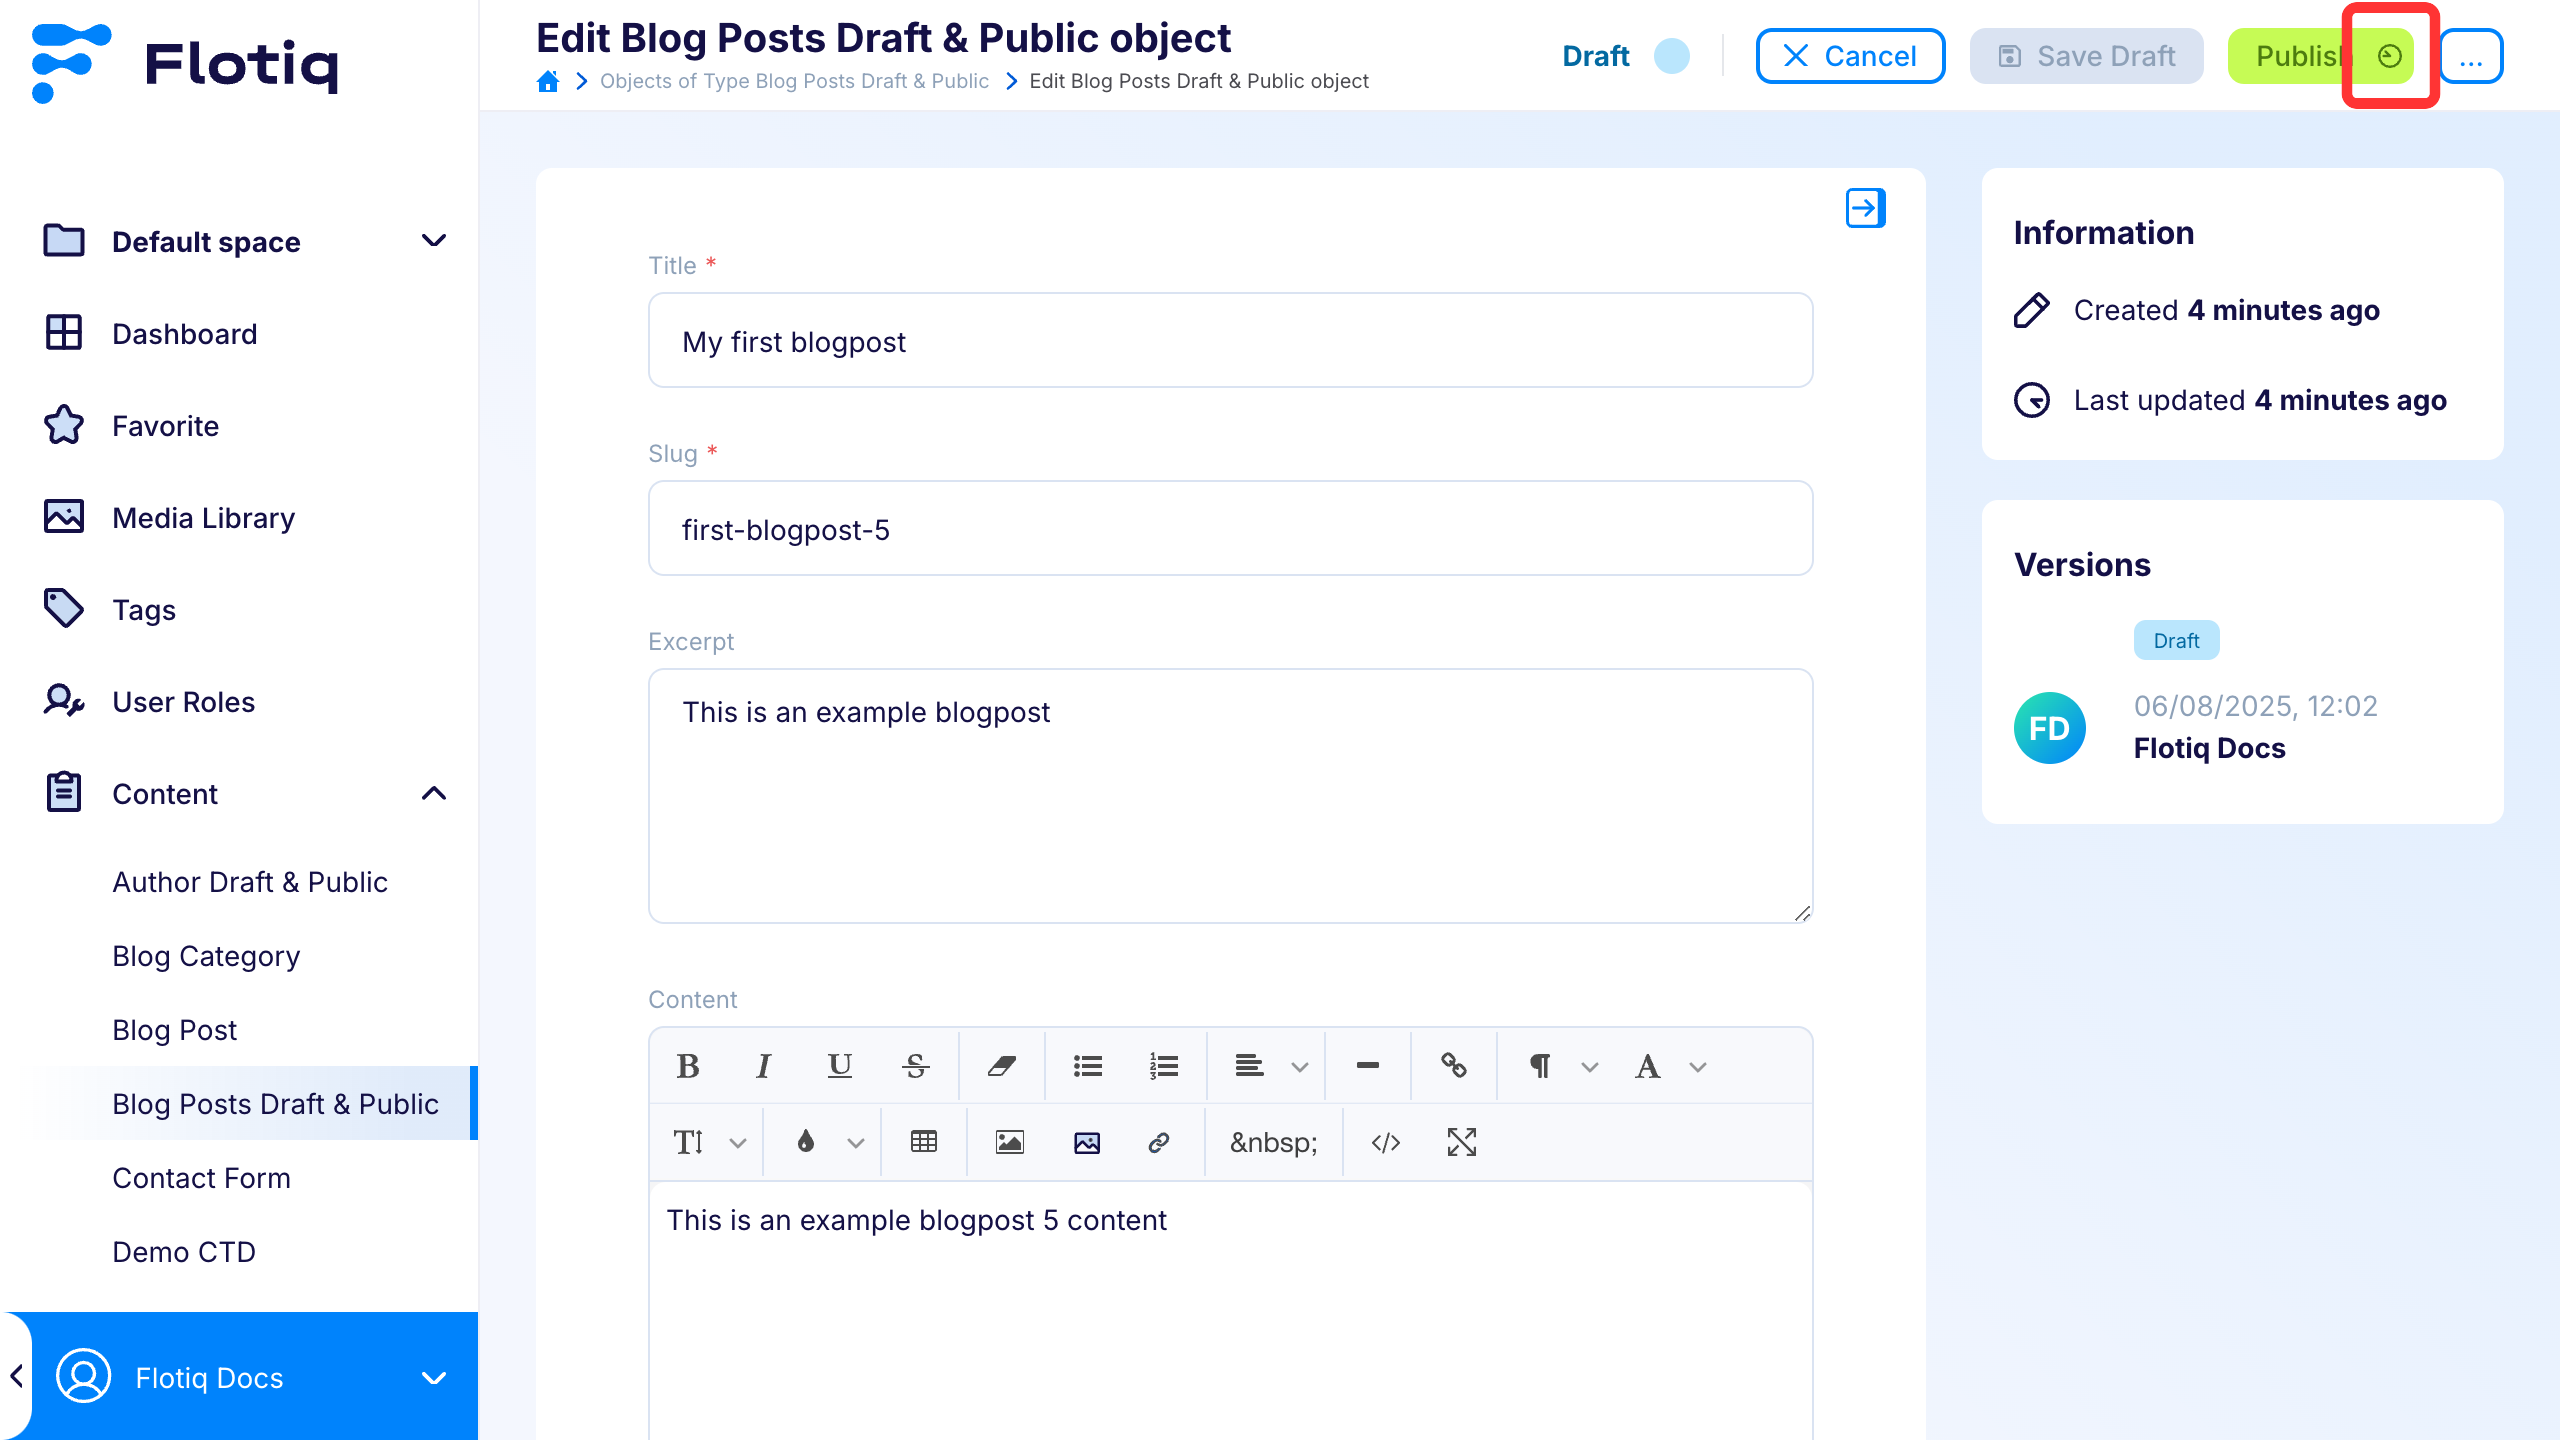
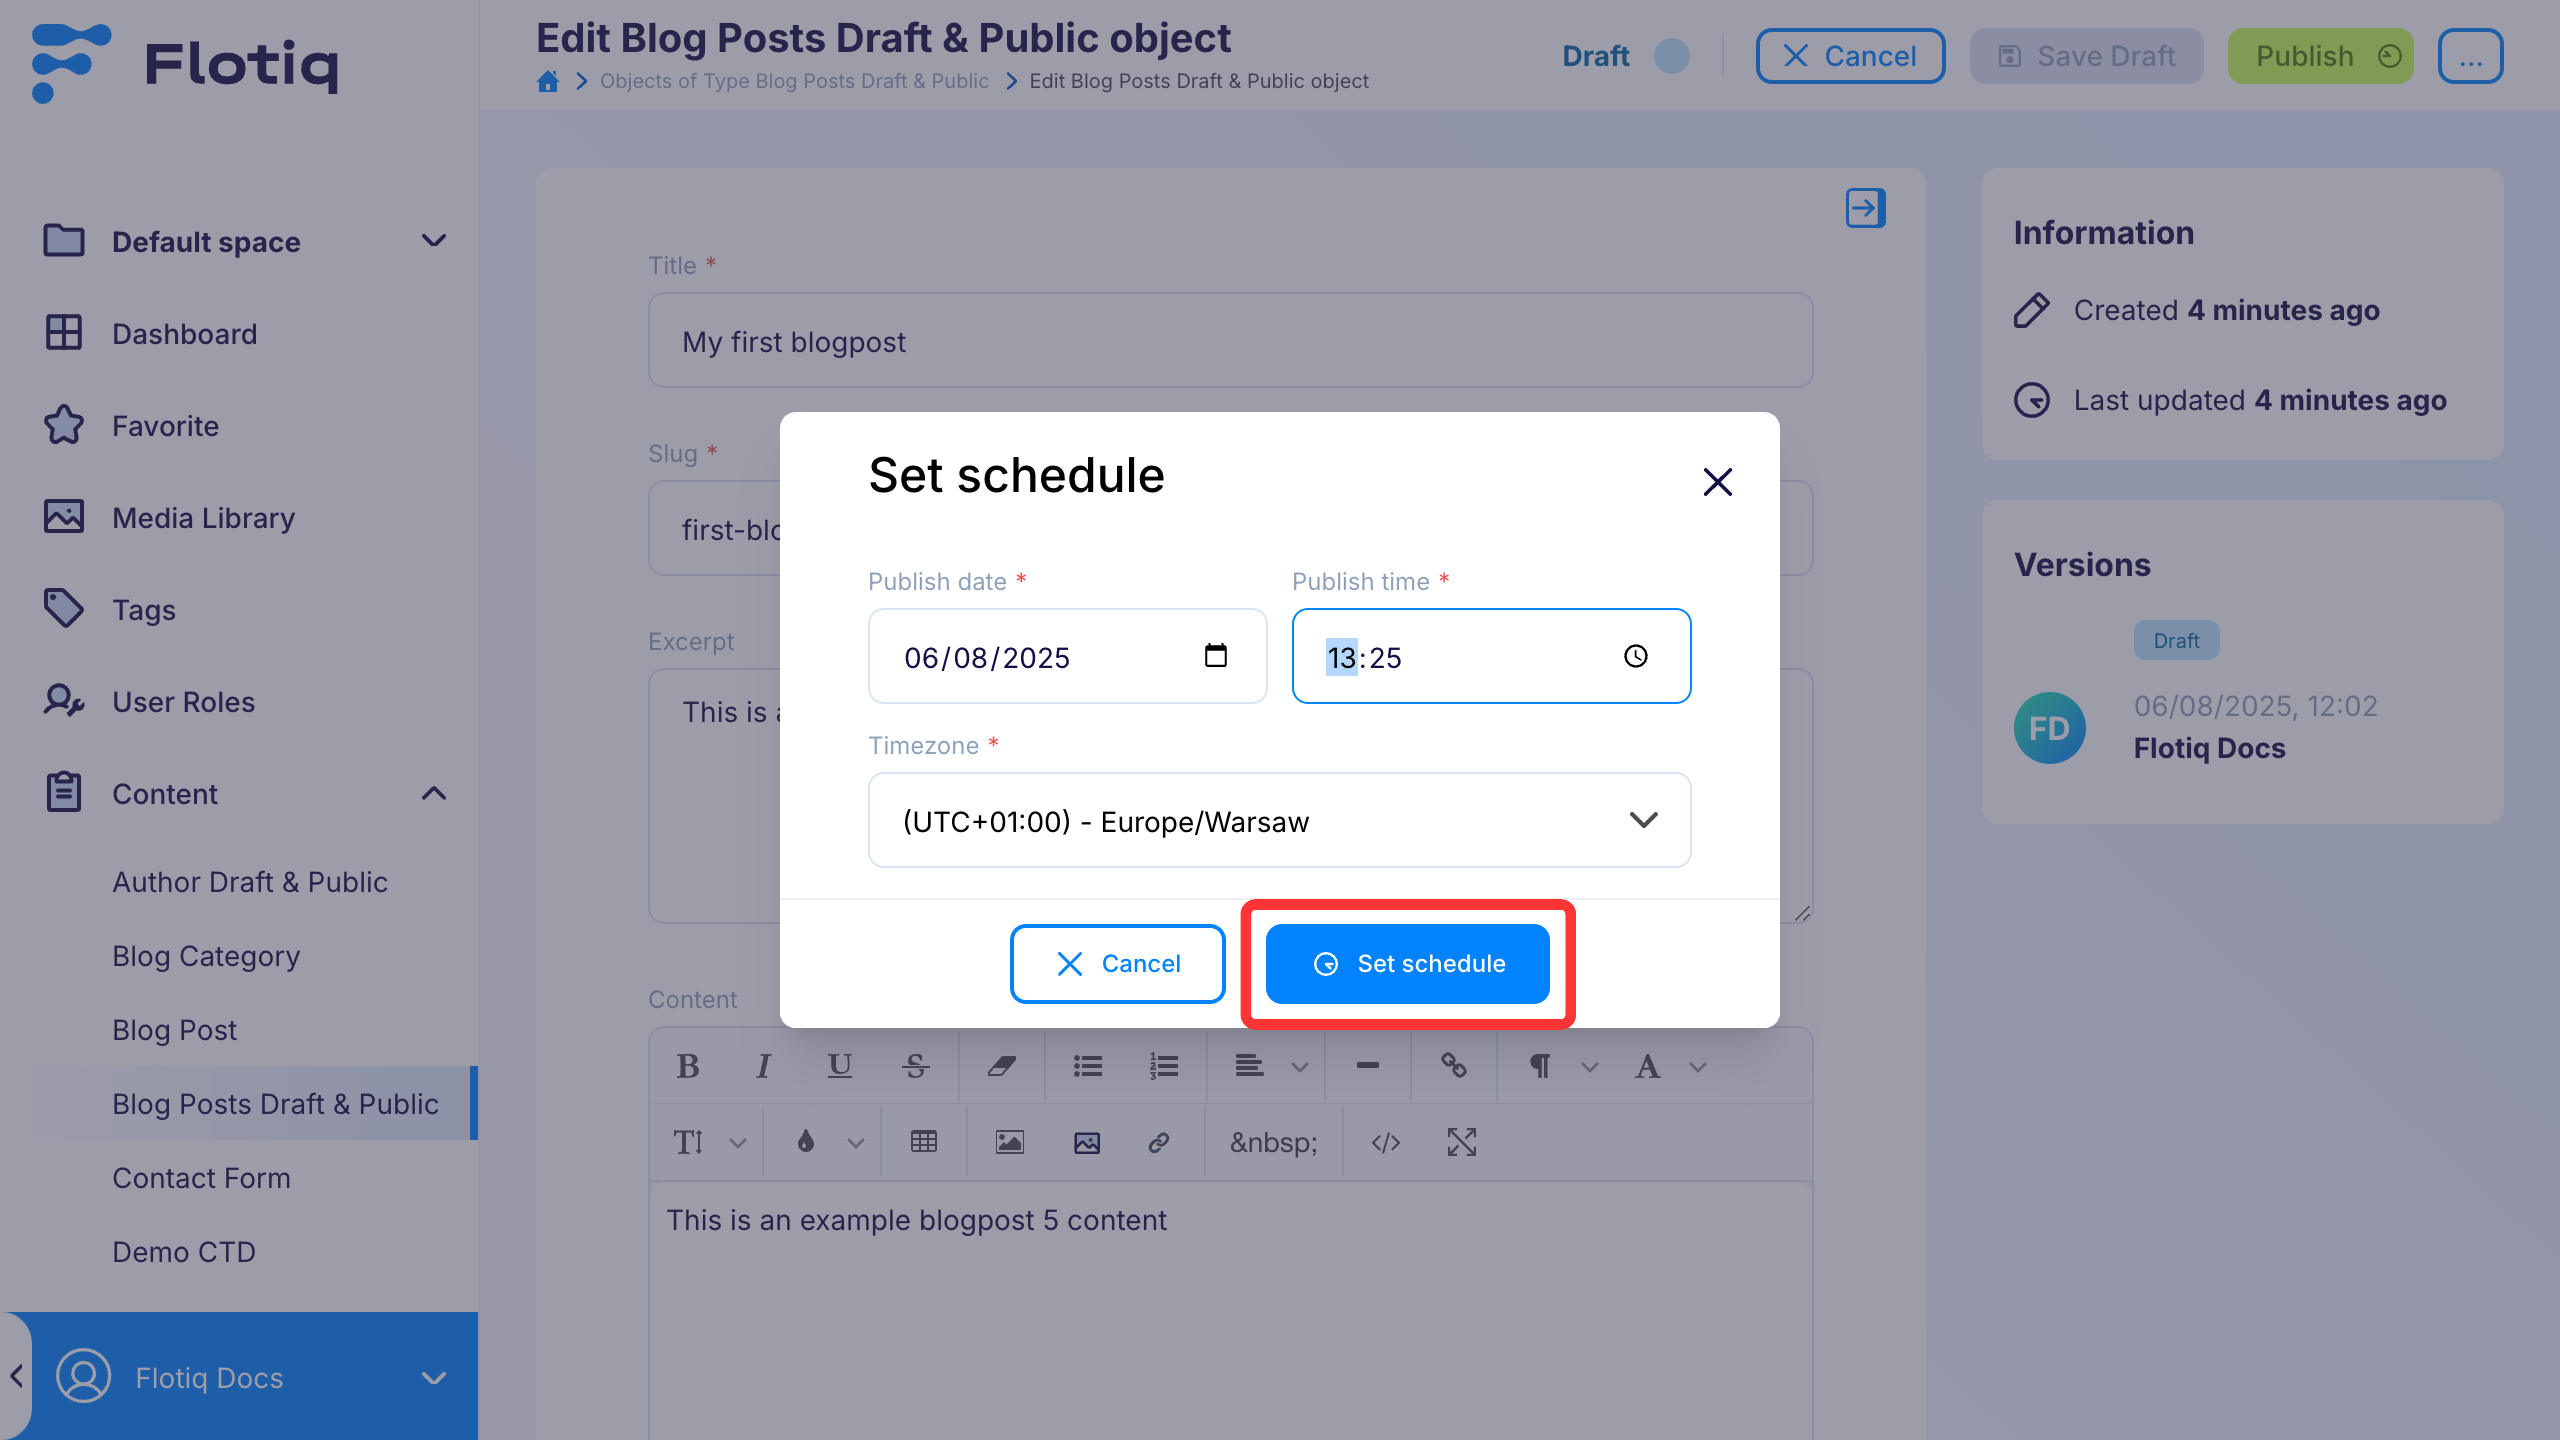
That's all! The status of your content changes to scheduled. When the set date/time arrives, Flotiq automatically publishes your content and updates the status to public.
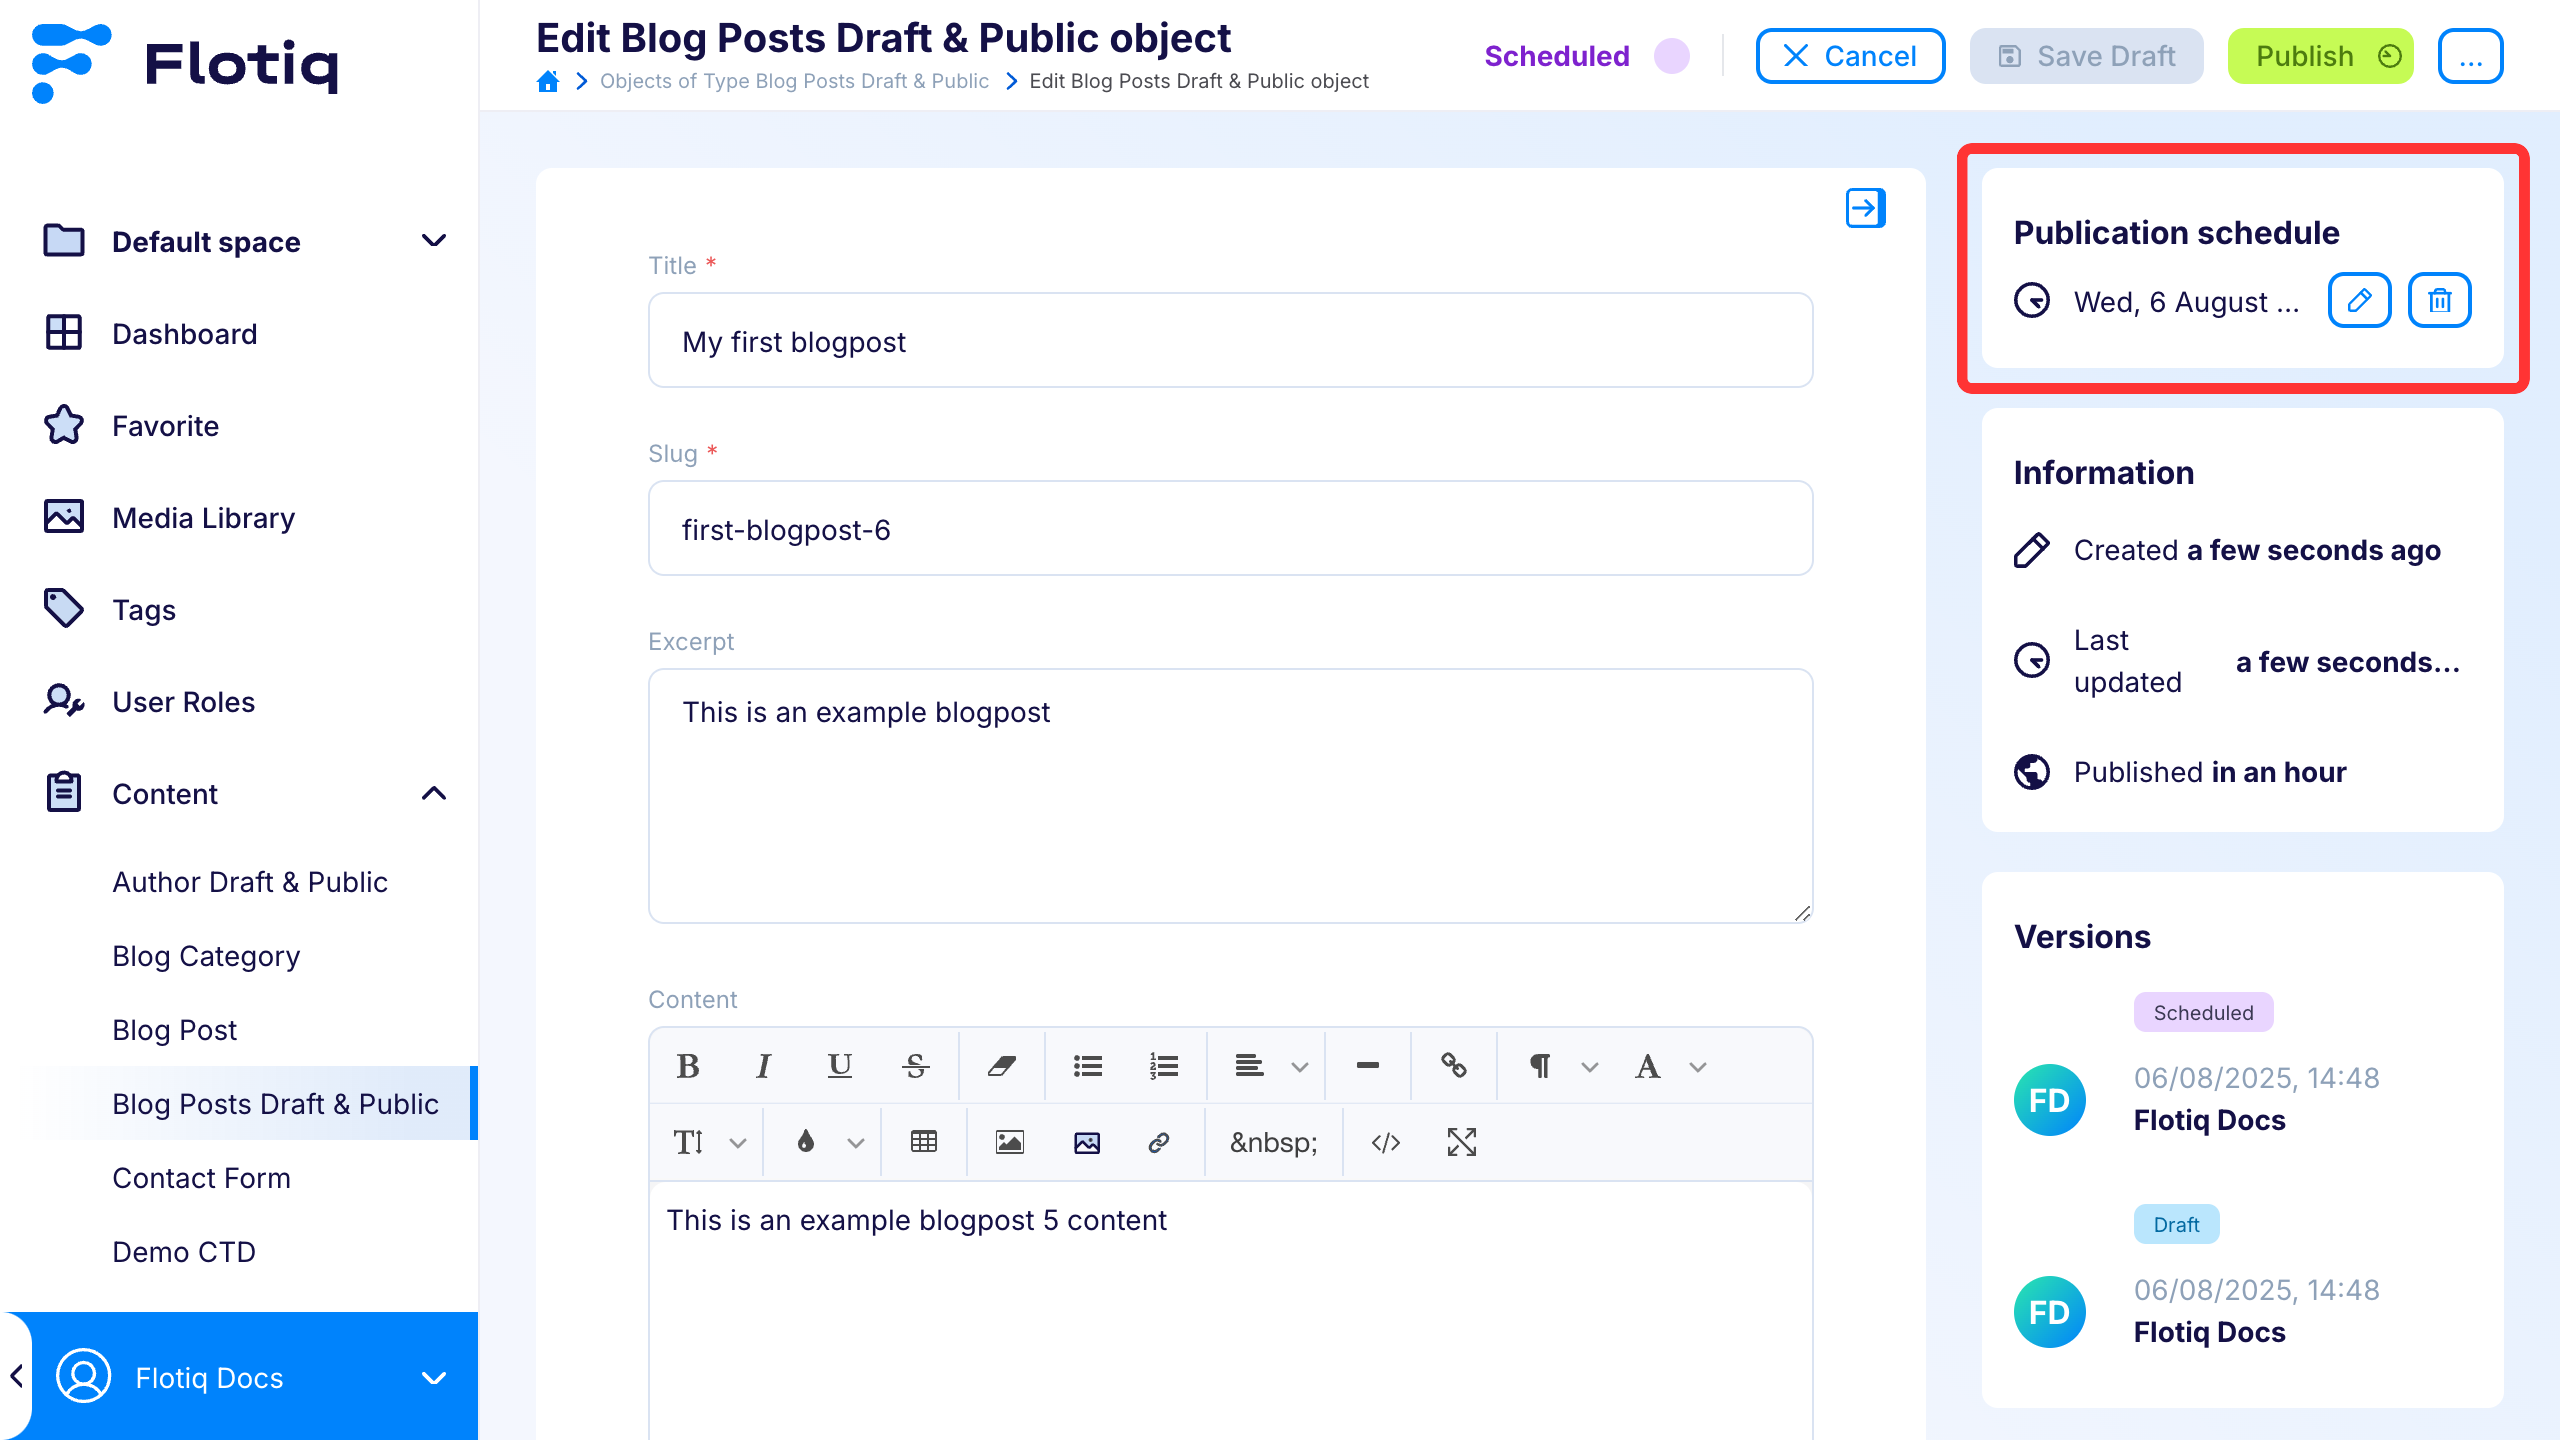
The UI also gives you clear info about your scheduled content:
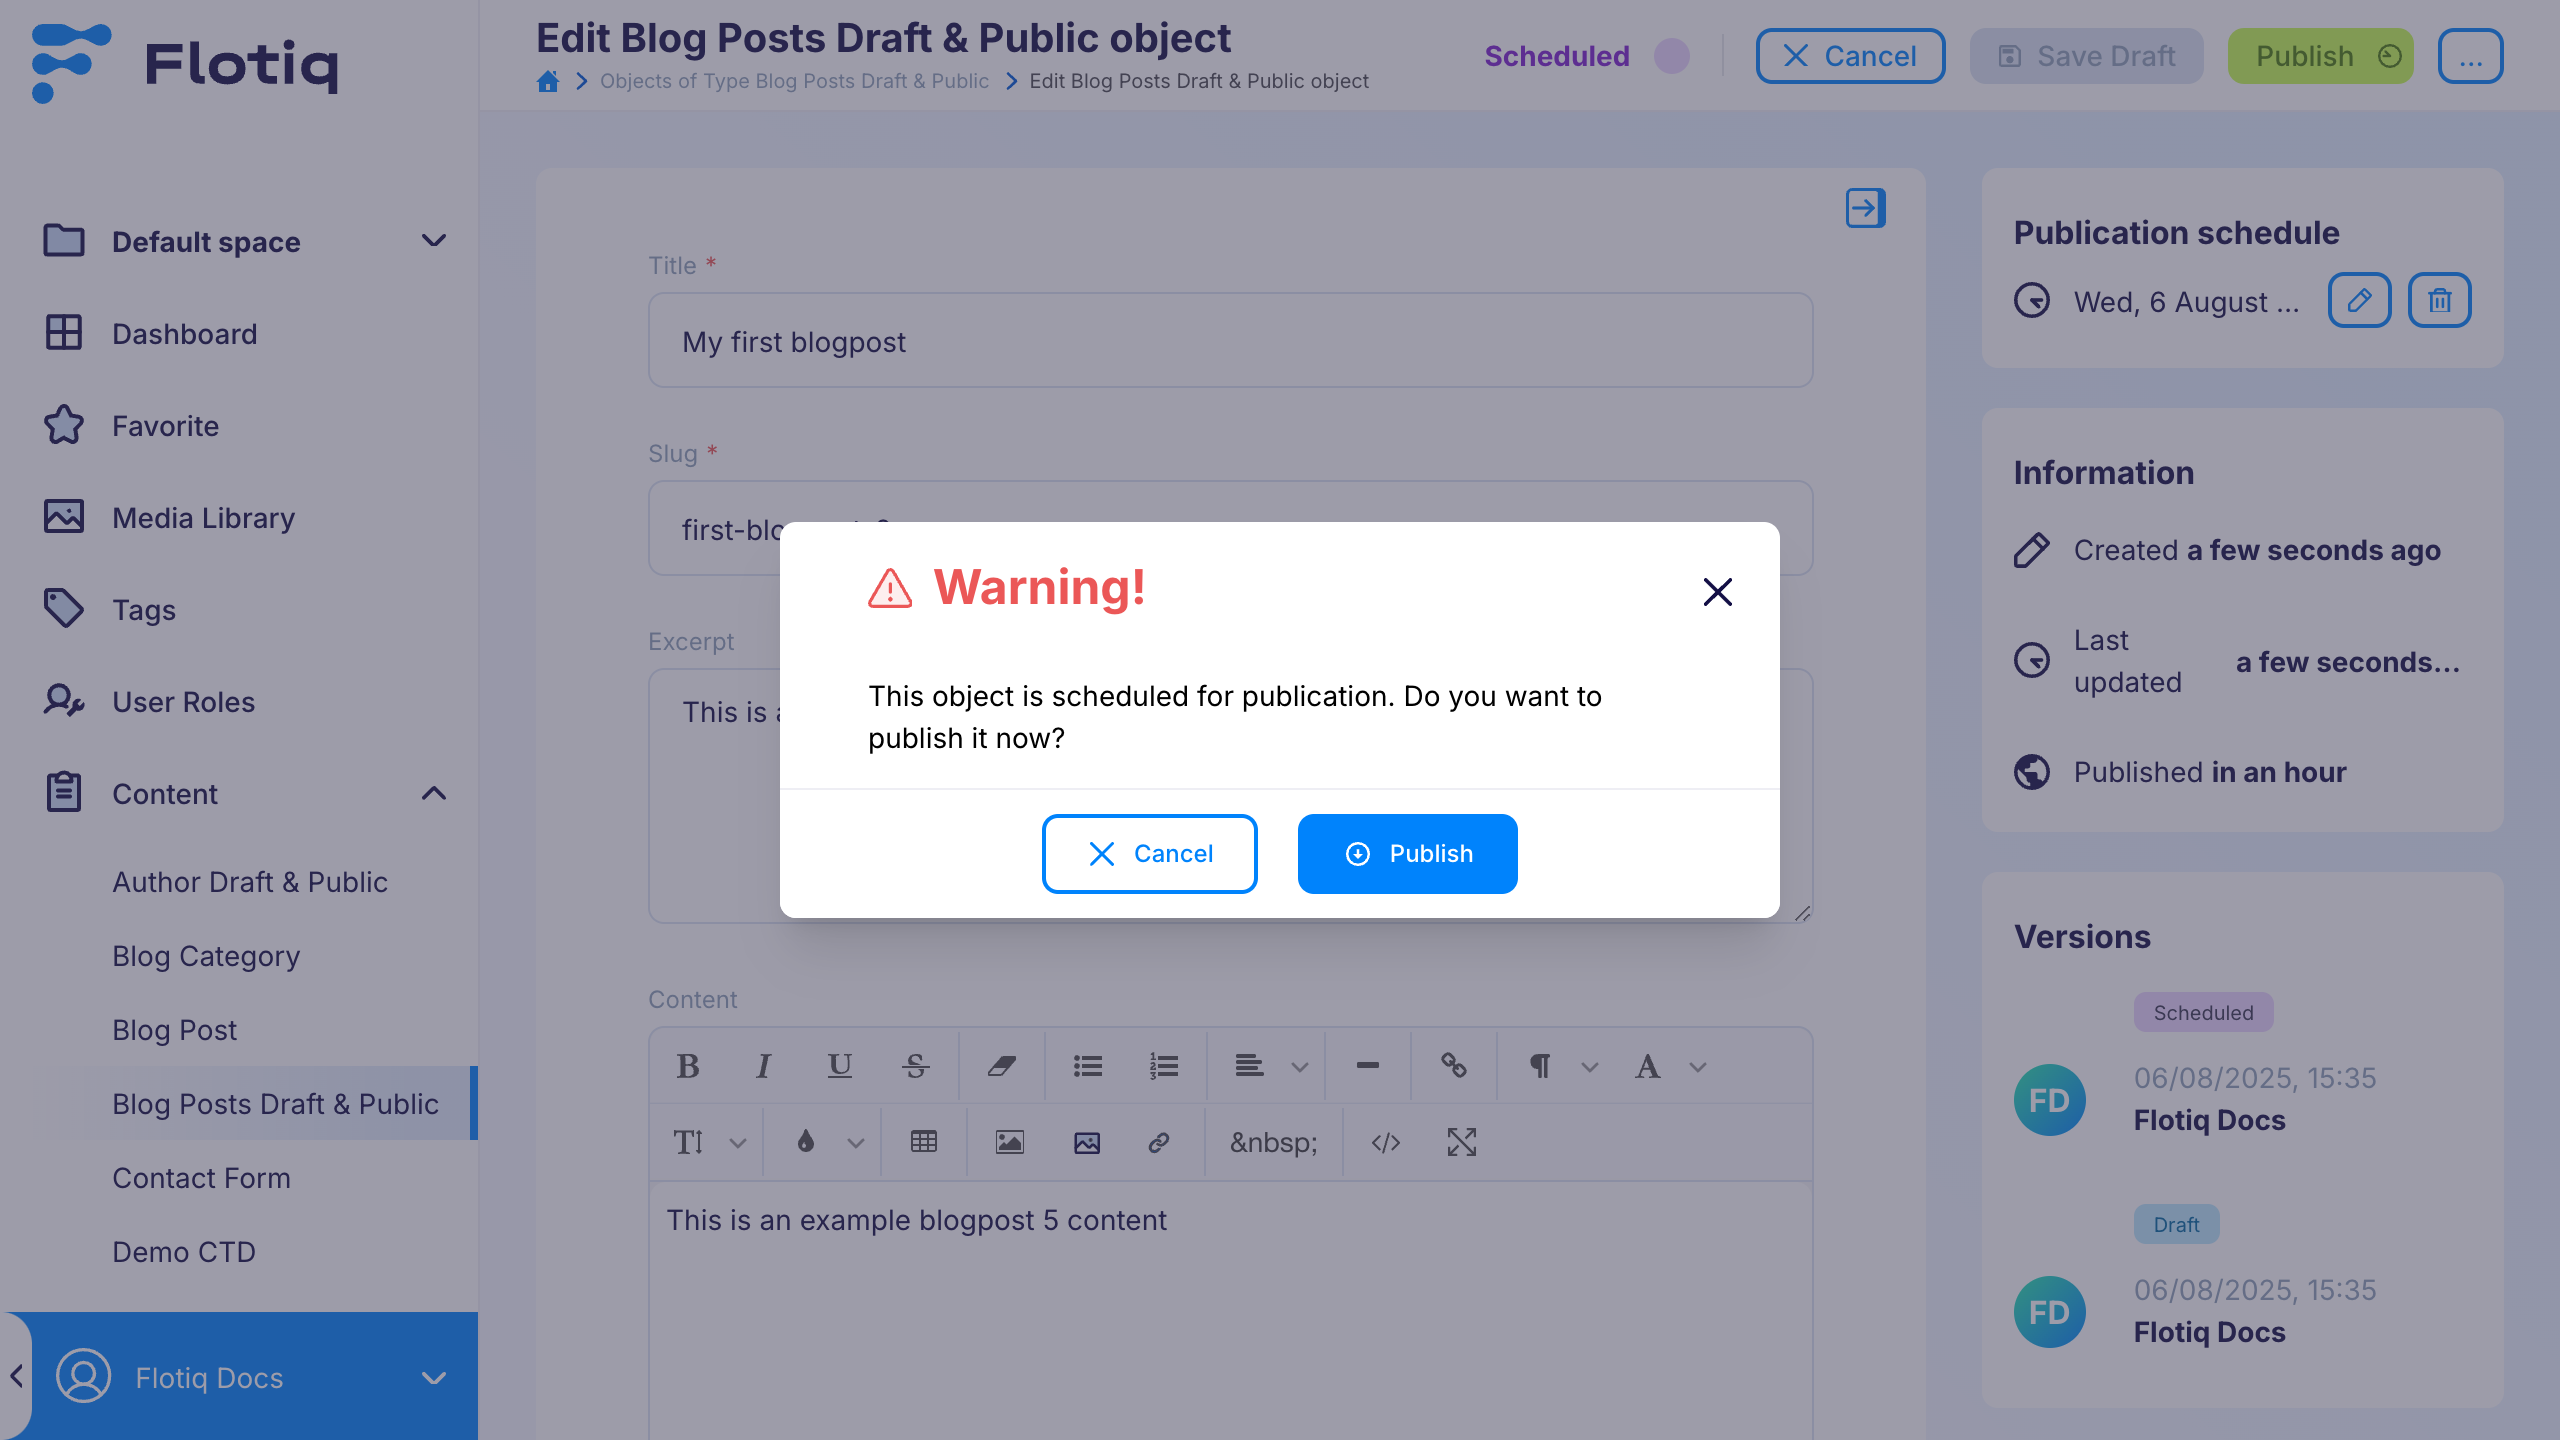
Sometimes, you don’t want to wait, you just want your content live now.
Flotiq makes that easy with its instant publishing feature. Once your content is ready and you're confident it's good to go, simply click the Publish button. A confirmation modal will appear to ensure you want to publish immediately.
This extra step helps prevent accidental publishing and gives you a final moment to review.
Scheduling content in Flotiq is super handy, but like any powerful tool, there are a few things to keep in mind to make sure everything runs smoothly.
You can’t schedule something to publish immediately. The system needs at least 5 minutes of lead time.
Always double-check your time zone settings. If your audience is global, this helps avoid awkward timing surprises.
If you make changes to your content after scheduling it, Flotiq will automatically cancel the schedule and switch the status back to draft.
This is a safety feature to prevent outdated or unfinished content from going live. Just reschedule once your edits are done.
If you decide not to wait, you can hit the Publish button anytime. Flotiq will ask for confirmation before publishing immediately — just to make sure you’re ready
You’ll see a clear status label showing that your content is scheduled.
Use the pencil icon to tweak the schedule or the trash icon to cancel it altogether if plans change.
Scheduling publication in Flotiq is a powerful yet simple way to stay ahead in the content game. It frees you from manual publishing chores and helps guarantee your audience gets fresh content right on time. If you love the idea of planning your editorial calendar with precision while keeping editing flexible and controllable, this feature is a perfect fit. Give it a try on your next project and feel the difference it makes!
Ready to simplify your content workflow and never miss a publication deadline?
Try Flotiq’s scheduling feature today and experience seamless, automated publishing. Head over to your Flotiq dashboard, start scheduling your content, and take control of your editorial calendar like a pro!
📣 Haven’t tried Flotiq yet? You can sign up for free and start scheduling smarter today.
.png)