Building a blog in 3 minutes with Flotiq, Gatsby and Netlify
In this deep dive you will learn how easy it is to build and deploy a blog with Flotiq, Gatsby and Netlify. Follow along, and you should end up with a working blog page in no more than 3 minutes!
Define a Content Type
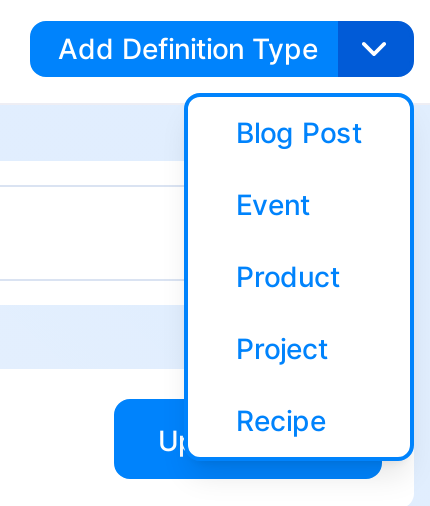
First off - you will need to define how your content will be structured in Flotiq. For this particular project you will need our predefined Blog Post type (read more about predefined types). Go to the Content Type definitions tab and choose Blog Post .
Caution
This tutorial assumes you will follow along and use the same naming as we did. You're free to adapt this to your needs, but please mind that the code repository we provide will make use of the specific field names we defined. If you make any changes in the Content Type - you will also need to apply them later on - in the code.
This is how the Content Type Editor should look like in the end:
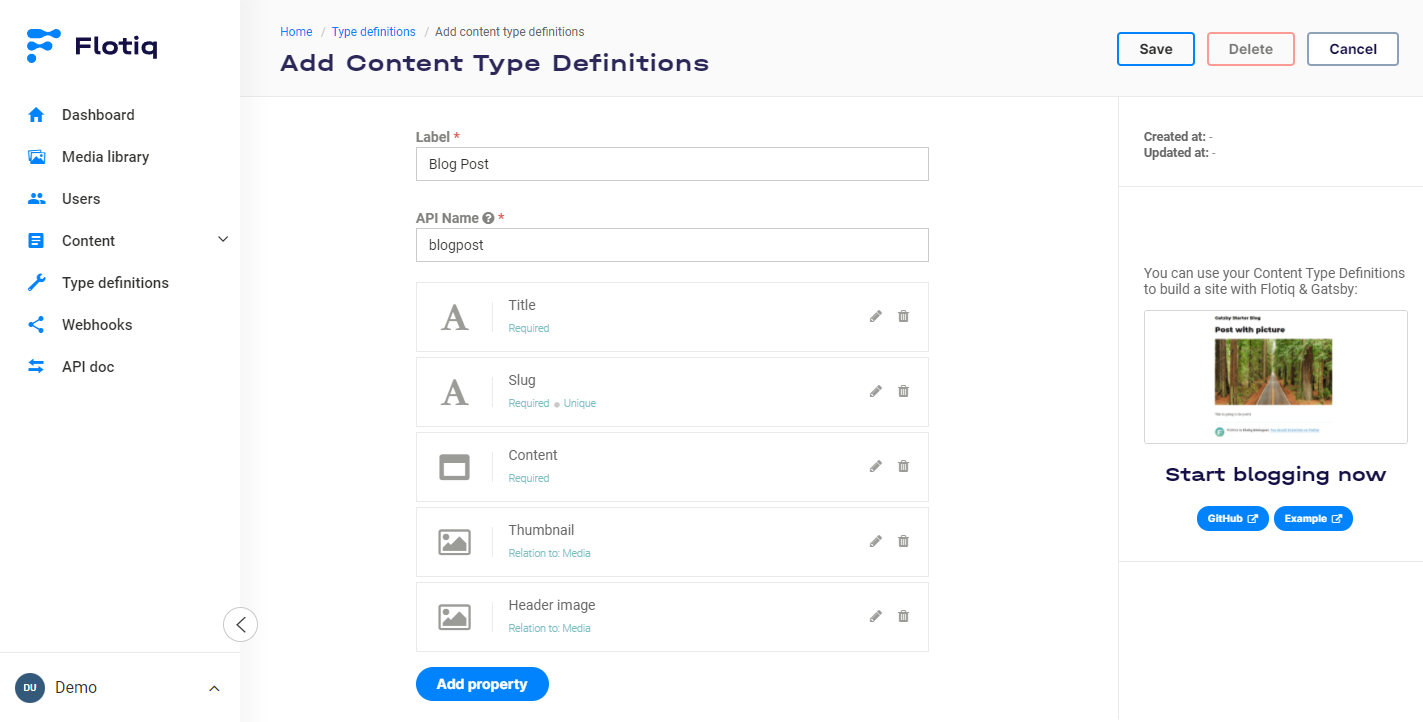
If you're happy with the result - click the Save button and navigate to Content → Blog Post in the side menu.
Hint
At this point you can also verify the result of your work in the Dynamic Content API - head to you API docs and see how the API has automatically expanded to support your new Content Type:
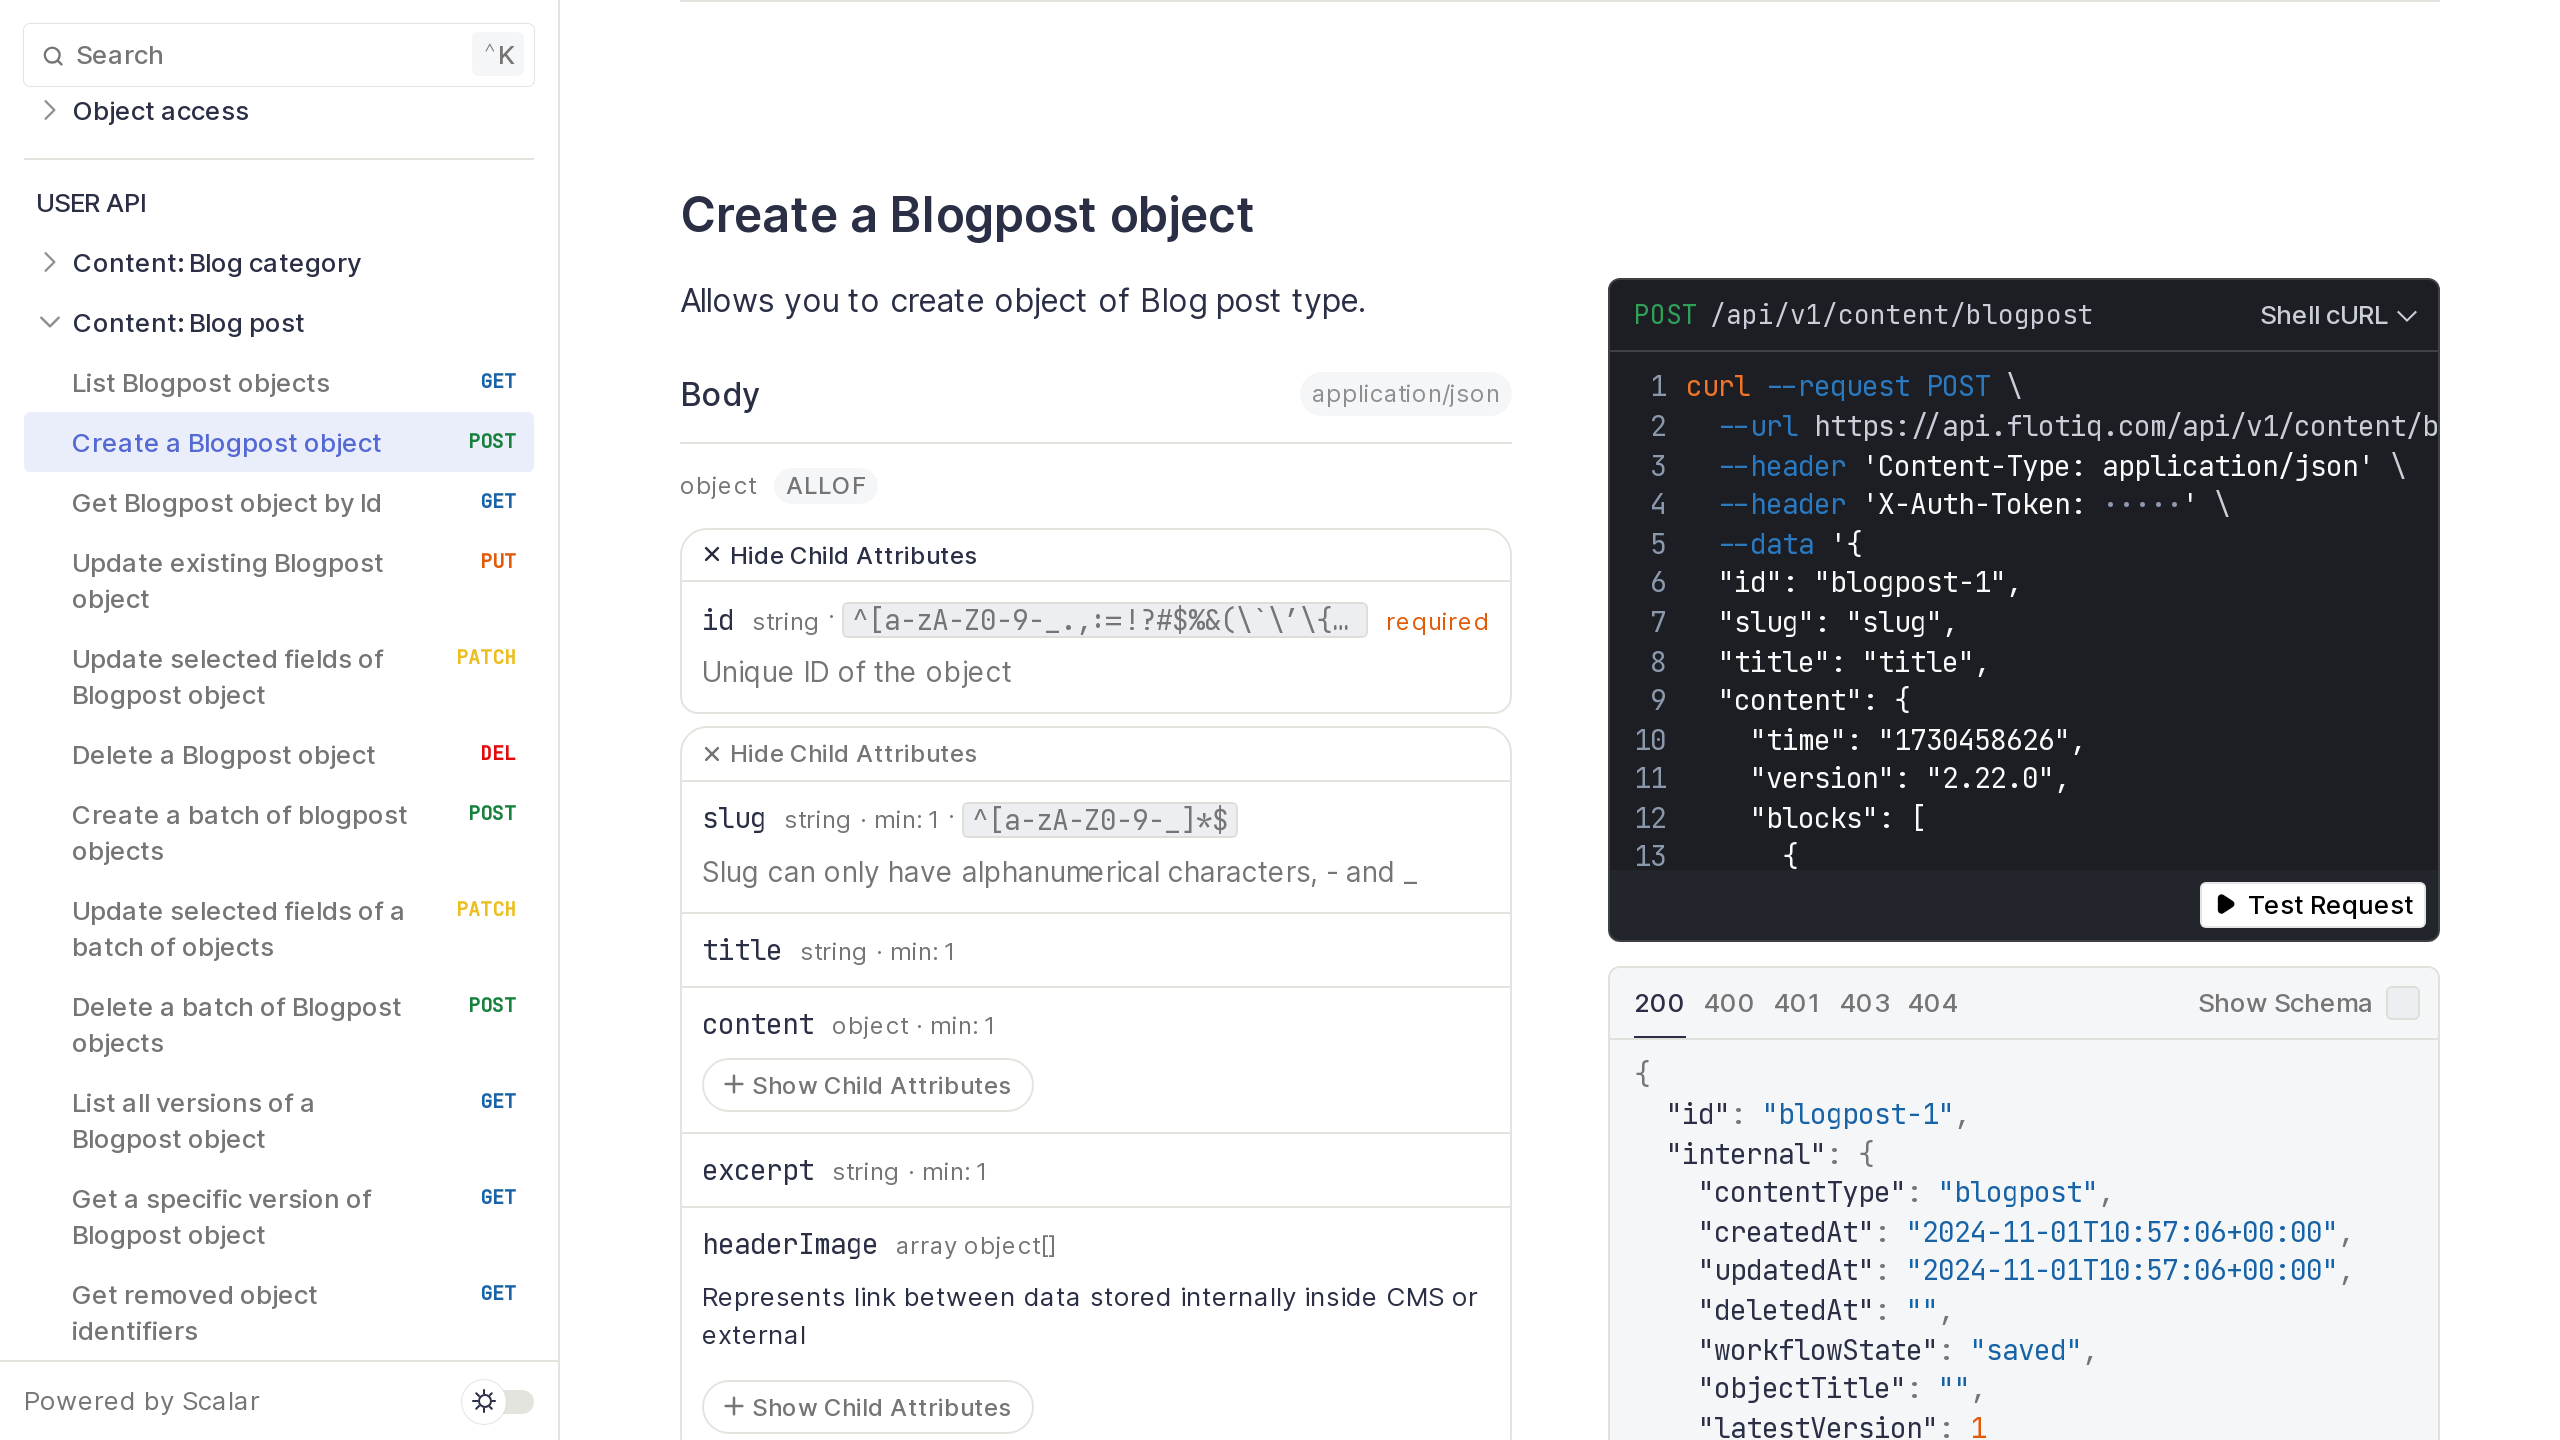
Three important things to note here:
- The list of endpoints now contains endpoints specific to the Blog Posts type you just defined.
- The API docs are automatically generated and contain all the characteristics you provided during Content Type creation.
- The API docs are enriched with code samples that will help you immediately work with your content.
Build your content
Note
If this is the first time you're using Flotiq - check out the Media library section in the main menu. This is where you can upload your media files (images, documents, etc.) or download free images from the vast Unsplash library. Before adding your first blog post - go and upload a picture, it will be more fun to browse through the blog once you build it.
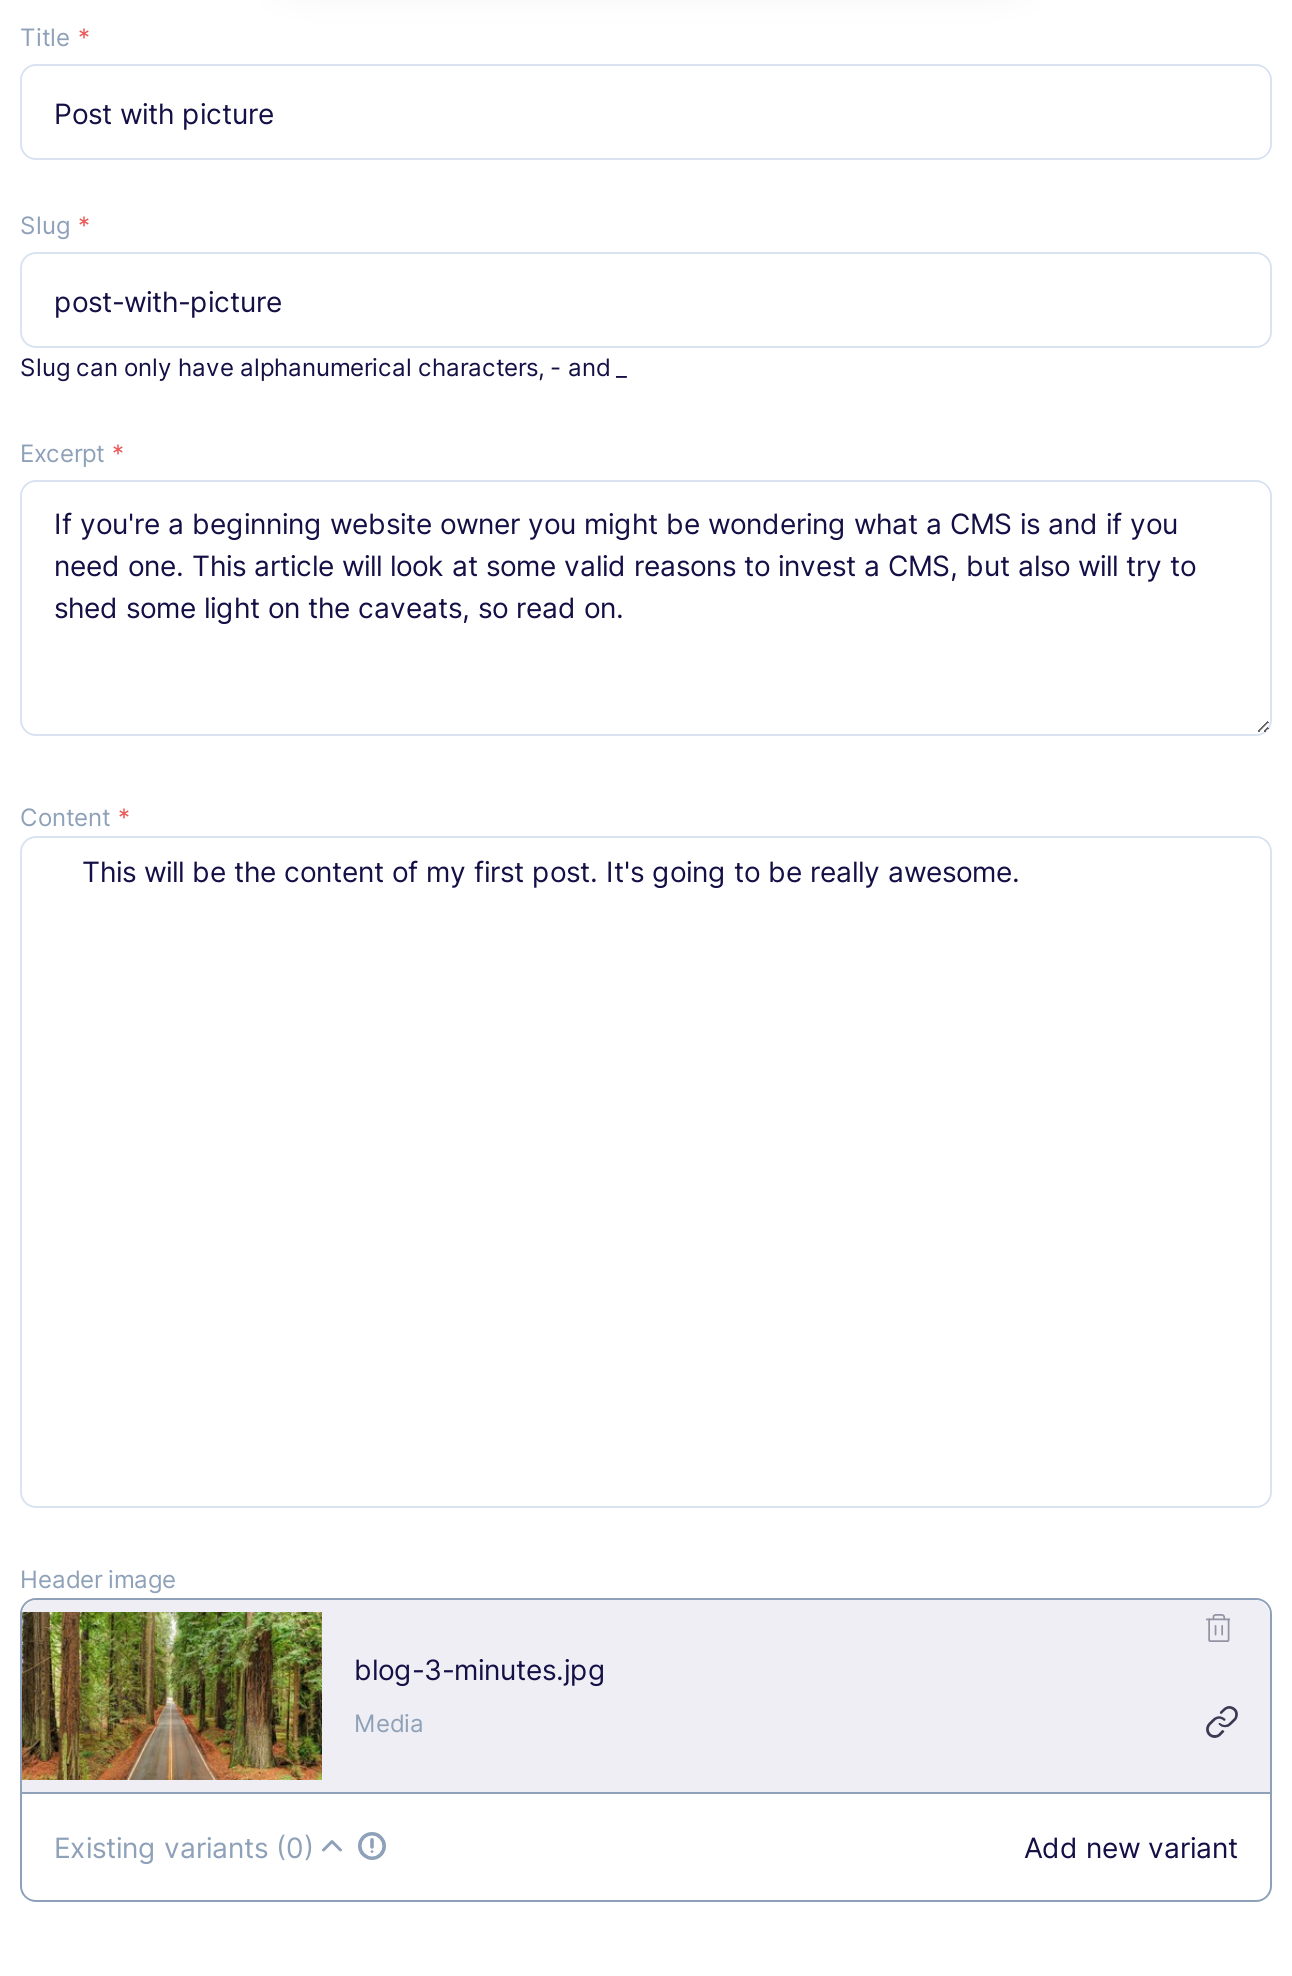
It's now time to write your first post! The first time you go to the Blog Posts item in the Content menu you will be prompted with a screen encouraging to create your first Content Object, go ahead and click the Add new Blog Post object button. You will see an empty form that is automatically generated based on the Content Type Definition you provided in the previous step. Fill it in, however you like!
That's it. Now make sure you have your read-only API key in your clipboard!
Deploy
Caution
This part assumes you already have a Netlify account. It's free to create and doesn't require a Credit Card, just like Flotiq, so we really recommend it. If you don't have a Netlify account yet, click here to sign up
Ok, we're almost done. Have your API key in the clipboard?
Click here:  and paste the key in the
 YOUR FLOTIQ API KEY field.
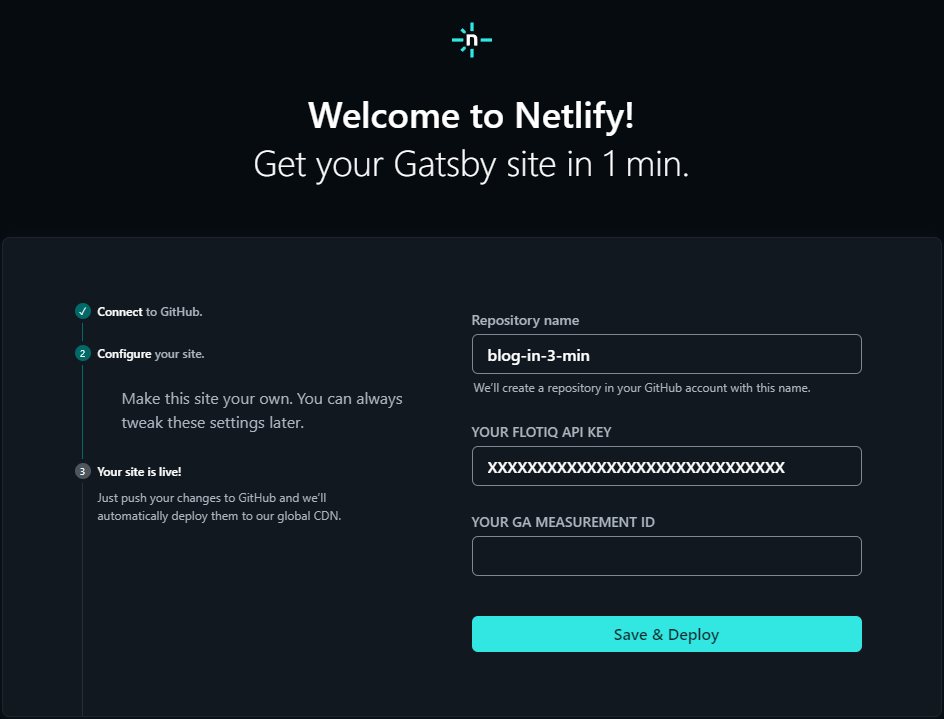
Also make sure to give your app a name, then click Save & Deploy and there - in a minute your blog will become publicly available! Just like this one.
Success
Congratulations! You just deployed your Flotiq-based blog. Please share your success with us - drop us an email, a chat message or mention us on Twitter. We're eager to see what you build!
Note
For this particular example we used our blog boilerplate with the main Gatsby configuration in order to provide integrations with Flotiq and Netlify. You can explore our GitHub repository to see how easy it was to connect Gatsby to Flotiq.
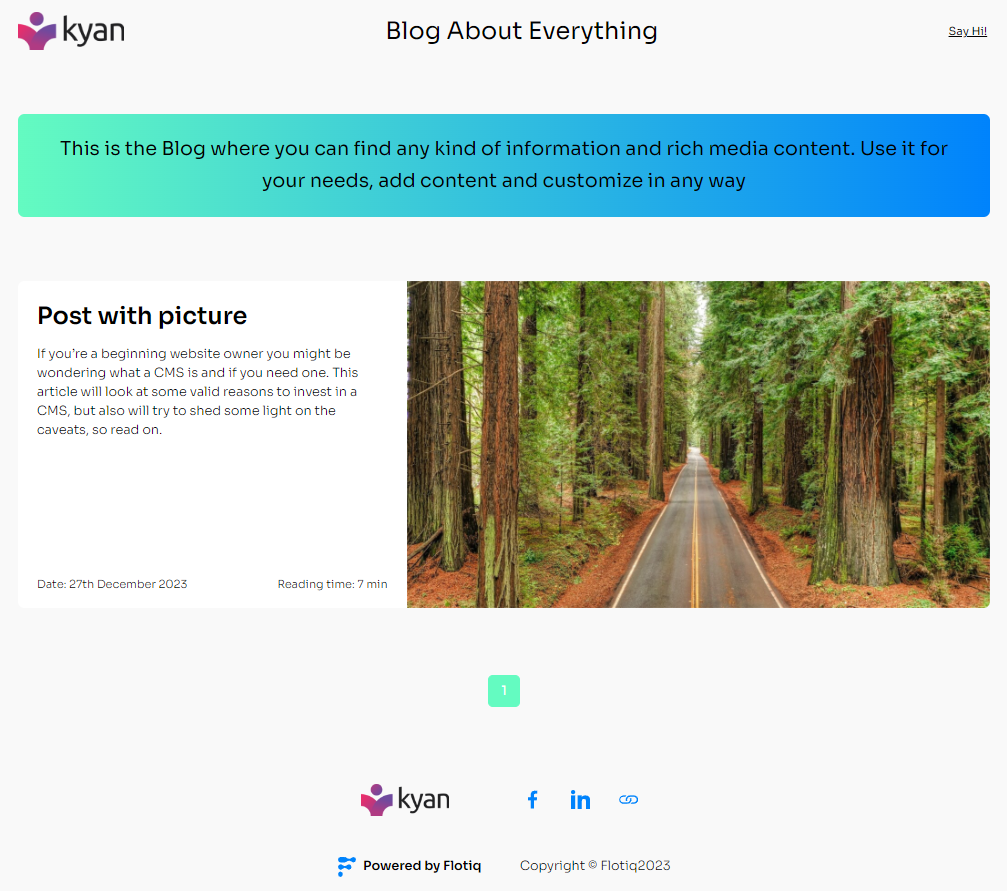
The end result should look like this:
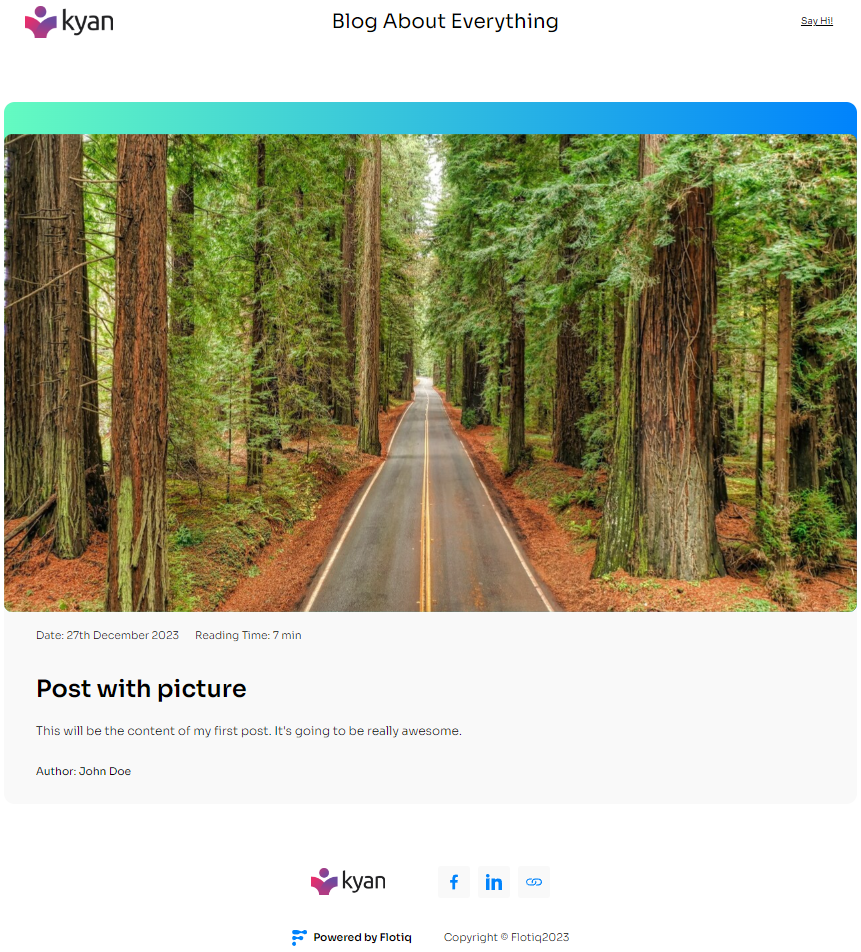
Result after open the post:
Summary
Congrats! Your all-shiny blog should now be live. You also learned a couple of important concepts that will help you make the most out of your Flotiq account, here's the recap:
- Defining Content Types with constraints,
- Populating data,
- Deploying a Flotiq-powered blog to Netlify, via Gatsby.
You probably want to get your hands dirty now, huh? Try the next deep dive and see how Flotiq makes your work easier with SDK packages that will put your Content Types straight into your favorite IDE. Oh, and by the way we will import all your WordPress posts at the same time.
You can also learn how to add a custom domain to your blog, for free, in this Deep Dive, featuring Cloudflare Workers.