Storing location data
Flotiq plays really well with location data, especially once you get to use our search capabilities. In this quick tutorial, we'll build a very simple web page that displays locations on a map and allows you to easily search your location database.
What we'll need:
- Flotiq account
- A
StoreContent Type Definition - Some
Storeobjects - A scoped API key
- Some HTML, CSS and plain JavaScript (to keep things simple).
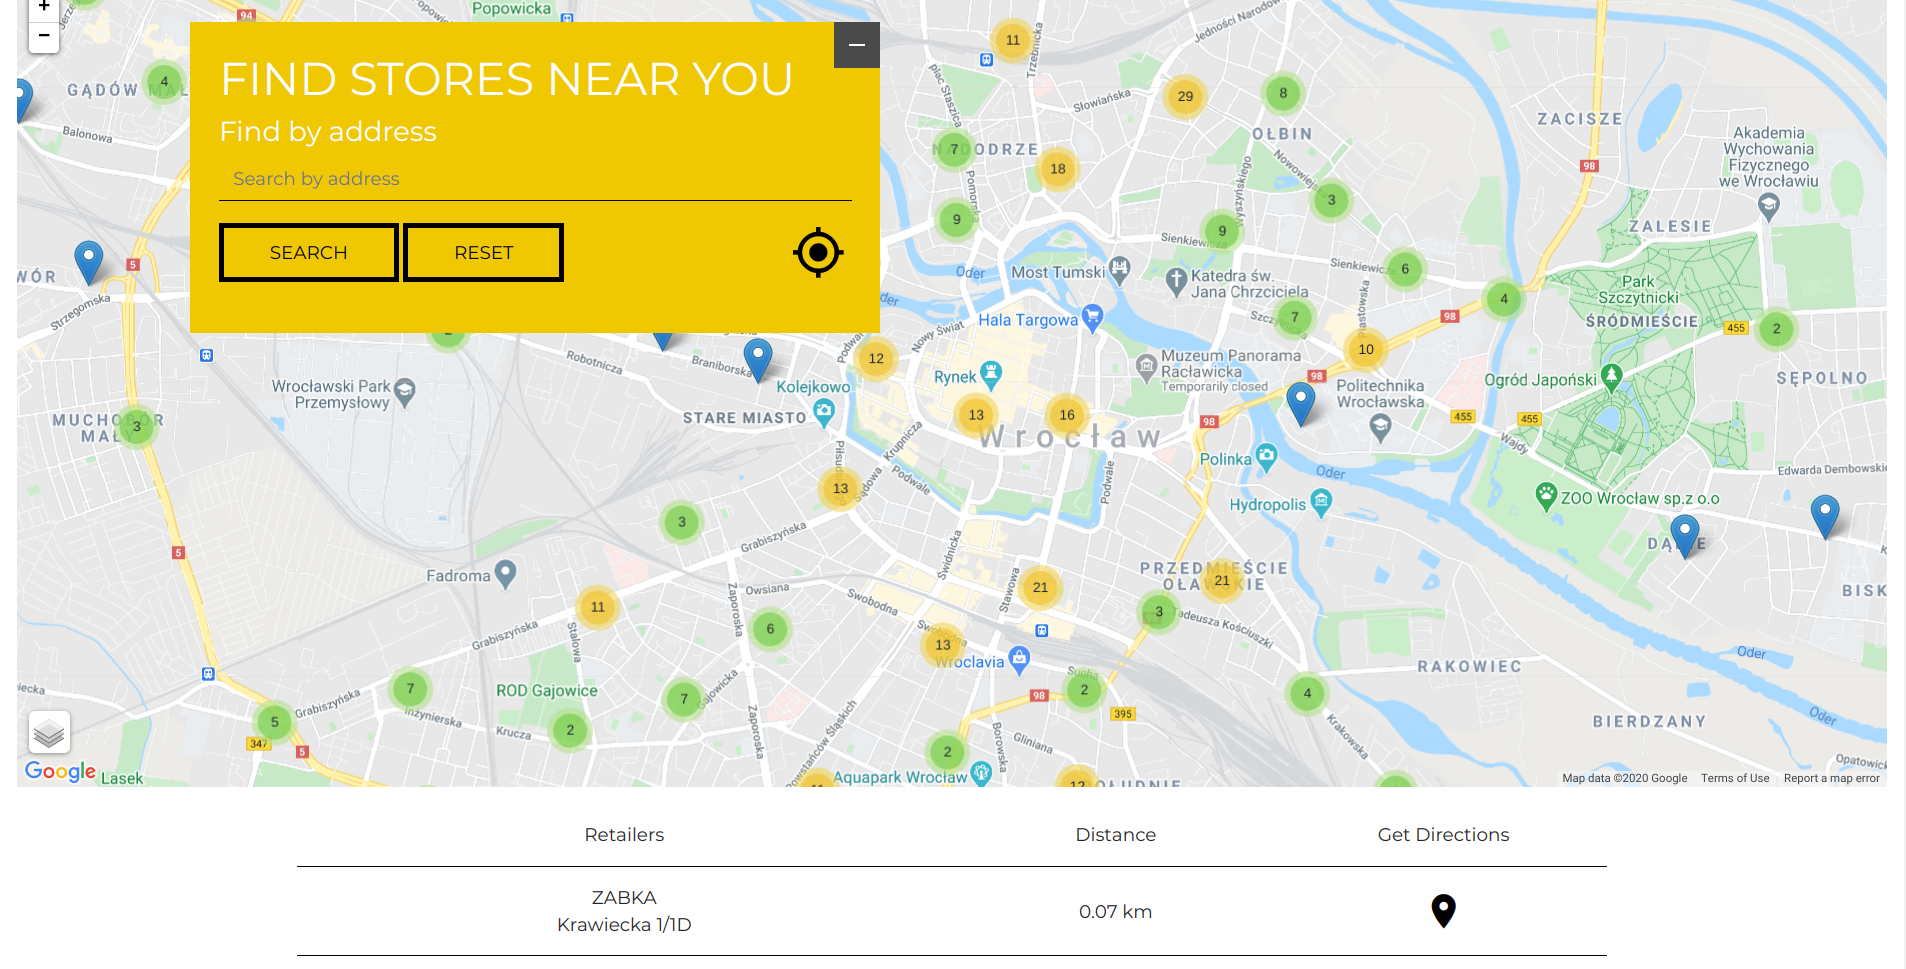
And here's a sneak peek at what we'll build.
Setting up Flotiq
Once you register a Flotiq account and log in, you'll have to create a new Content Type Definition. This is how you tell Flotiq what kind of data you will be dealing with. Mine looks like this:
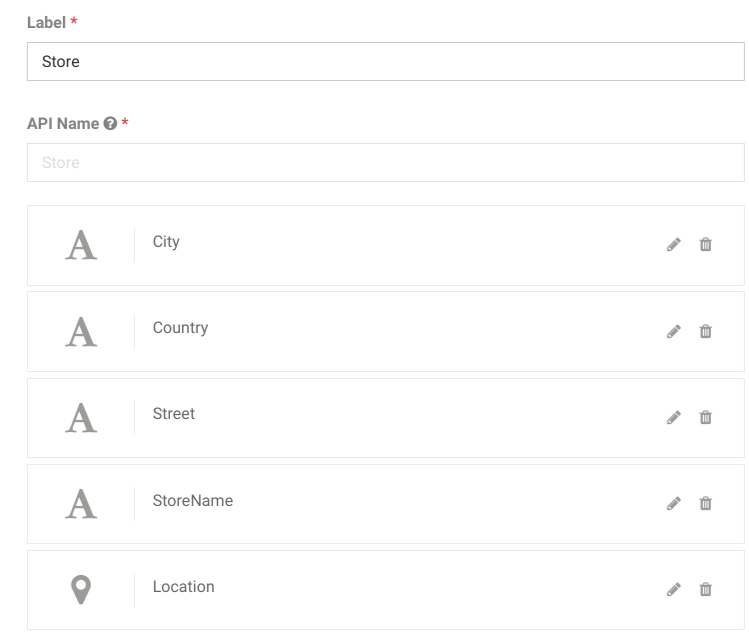
I recommend that you use the same labels - it will be easier to follow the rest of the tutorial.
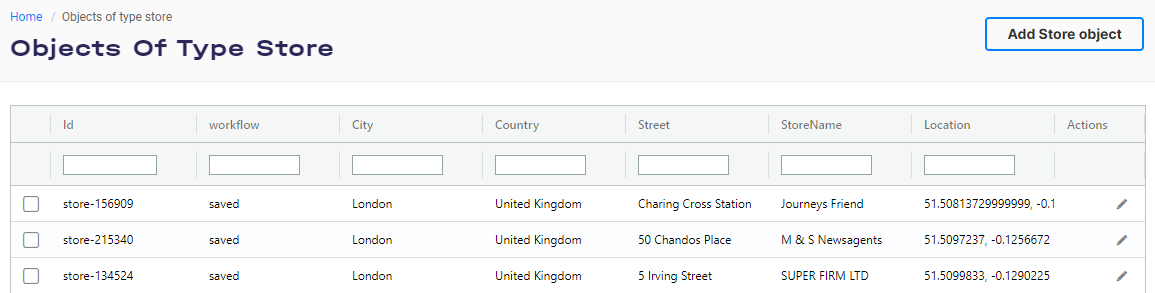
Next - create several Content Objects under the Store type. I added 3 shops in central London:
Finally - set up a scoped API key - you'll need it in a moment.
Building the page
We will now build a very simple page, which will display the store's locations on a map. Let's start with the basics.
Scaffolding
Our index.html:
<html>
<head>
    <meta name="viewport" content="width=device-width, initial-scale=1.0">
    <link rel="stylesheet" href="index.css">
</head>
<body>
    <script src="index.js"></script>
</body>
</html>
We will be using Google Maps and Leaflet to display the locations on a map, so let's pull in the necessary scripts.
For Google Maps:
<body>
<!-- ... -->
    <script src="https://maps.googleapis.com/maps/api/js?key=YOUR_GOOGLE_MAPS_KEY" async defer></script>
</body>
And Leaflet:
<head>
<!-- Add this into <head> : -->
 <link href="https://fonts.googleapis.com/icon?family=Material+Icons"
        rel="stylesheet">
    <link rel="stylesheet" href="https://unpkg.com/leaflet@1.6.0/dist/leaflet.css"
        integrity="sha512-xwE/Az9zrjBIphAcBb3F6JVqxf46+CDLwfLMHloNu6KEQCAWi6HcDUbeOfBIptF7tcCzusKFjFw2yuvEpDL9wQ=="
        crossorigin="" />
    <link rel="stylesheet" href="https://unpkg.com/leaflet.markercluster@1.4.1/dist/MarkerCluster.Default.css">
    <link rel="stylesheet" href="https://unpkg.com/leaflet.markercluster@1.4.1/dist/MarkerCluster.css">
    <link rel="stylesheet" href="https://unpkg.com/leaflet-control-geocoder/dist/Control.Geocoder.css" />
    <link rel="stylesheet" href="https://stackpath.bootstrapcdn.com/bootstrap/4.5.2/css/bootstrap.min.css"
        integrity="sha384-JcKb8q3iqJ61gNV9KGb8thSsNjpSL0n8PARn9HuZOnIxN0hoP+VmmDGMN5t9UJ0Z"
        crossorigin="anonymous">
</head>
<body>
<!-- Add this before </body> -->
 <script src="https://unpkg.com/leaflet@1.6.0/dist/leaflet.js"
        integrity="sha512-gZwIG9x3wUXg2hdXF6+rVkLF/0Vi9U8D2Ntg4Ga5I5BZpVkVxlJWbSQtXPSiUTtC0TjtGOmxa1AJPuV0CPthew=="
        crossorigin=""></script>
   <script src="https://unpkg.com/leaflet.markercluster@1.4.1/dist/leaflet.markercluster.js"></script>

    <script src="https://unpkg.com/leaflet-control-geocoder/dist/Control.Geocoder.js"></script>
    <script src='https://unpkg.com/leaflet.gridlayer.googlemutant@latest/Leaflet.GoogleMutant.js'></script>
</body>
Now, add a map container to your <body>:
<body>
    <div data-map class="map-container"></div>
</body>
And you can now initialize the map, by adding this to your index.js:
document.querySelectorAll('[data-map]').forEach(function (mapContainer) {
/**
* Create:
* - Map and its view layer
* - geocoder control (to search cities)
* - create variable globalGroup for cluster group which will be created on first load (see onMarkersLoaded)
*/
let map = L.map(mapContainer).setView([51.1079, 17.0385], 17);
let globalGroup;
let googleMaps = L.gridLayer.googleMutant({
type: 'roadmap' // valid values are 'roadmap', 'satellite', 'terrain' and 'hybrid'
}).addTo(map);
let osm = L.tileLayer('https://{s}.tile.openstreetmap.org/{z}/{x}/{y}.png', {
attribution: '© <a href="https://www.openstreetmap.org/copyright">OpenStreetMap</a> contributors'
});
L.control.layers({"Google Maps": googleMaps, "Open Street Map": osm}, null, {position: "bottomleft"}).addTo(map);
});
Note
Thanks to Leaflet - it's super simple to use both Google Maps and OpenStreetMap as our map providers. You can leave both, or choose one and remove the other. If you stick with Google, though, please remember to provide your Google Maps API key.
Finally - to make your map render in the browser, set the proper size in the index.css file:
body, html {
    padding: 0;
    margin: 0;
}

.map-container {
    width: 100%;
    height: 700px;
}
Once this is done - you should see a map rendered in your browser:
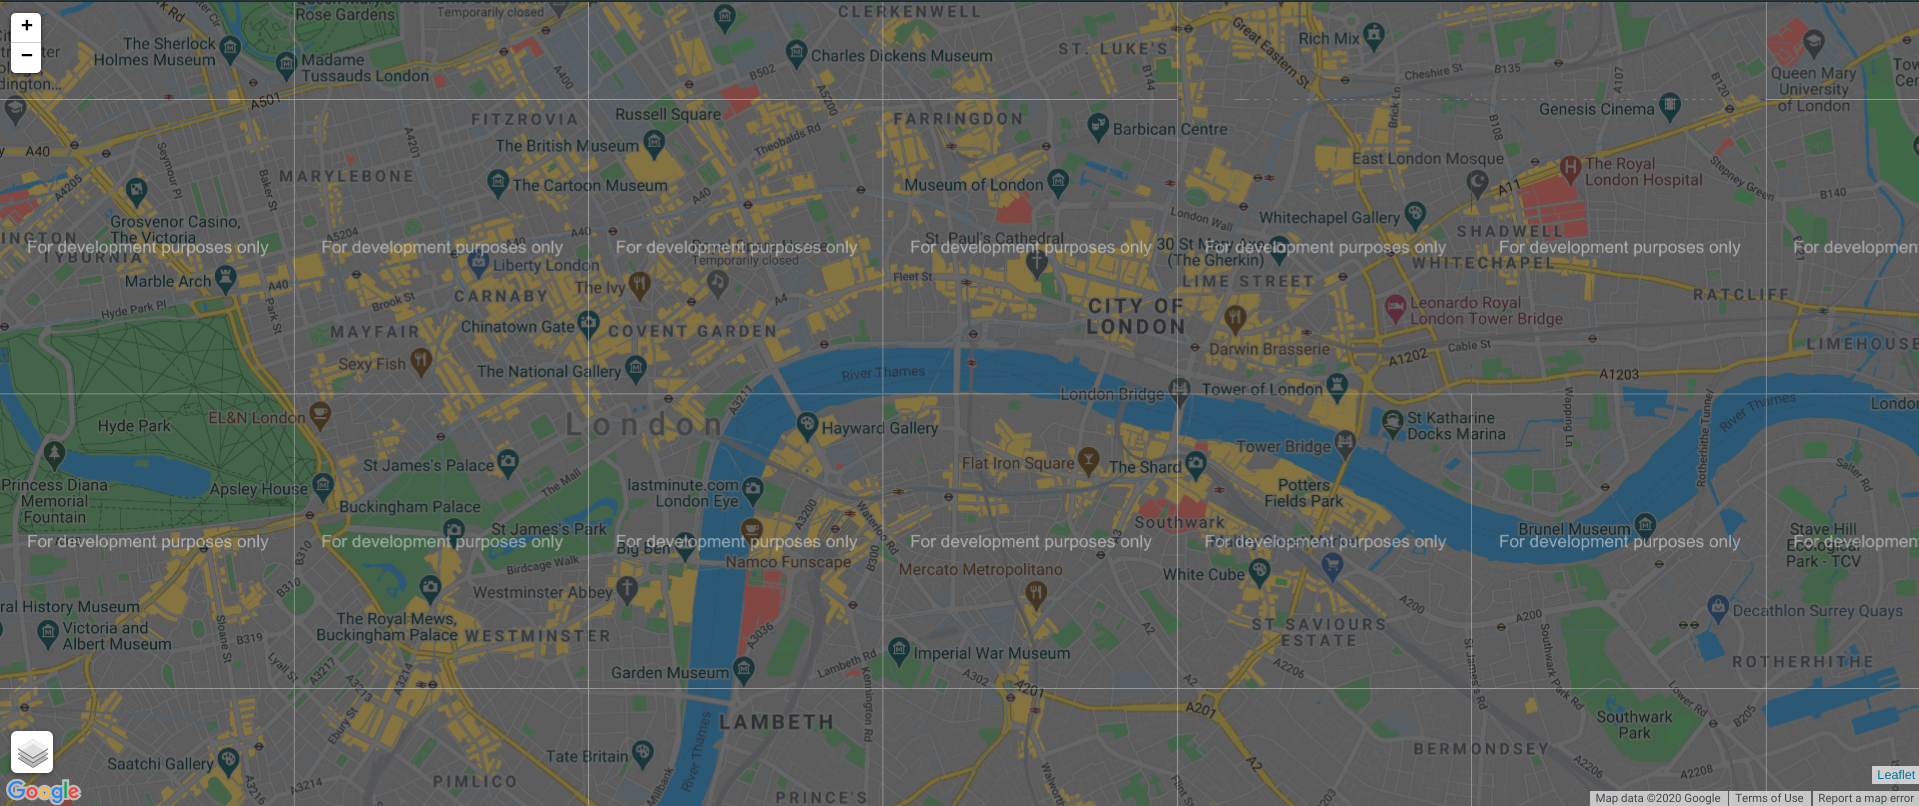
Note
I intentionally skipped some minor details from the above implementation. Check the full source code in 01-scaffolding folder in this repo.
Pulling data
We will now pull store data from Flotiq and display it on the map.
First - put these helper constants and variables at the top of the index.js file:
const TOKEN = 'YOUR_TOKEN';
const API_URL = 'https://api.flotiq.com';
const CONTENT_TYPE = 'Store';
const LOCATION_FIELD = 'Location';
const LIMIT = 1000;
const CLEAN_MAP_AT_ZOOM = 9;


let localMarkers = {};
let lastLoad = 0;
let currentPoint = {
  lat: 51.1079,
  lng: 17.0385
};

let placeCollection = {};
let doNotUpdate = false;
TOKEN constant with your API key, copied from Flotiq.
Warning
We strongly recommend creating a dedicated key for every application you build and explicitly defining the access scope to cover only the least amount of privileges required for a given app. Read more about Flotiq's scoped API keys in our docs.
Now, define the loadMarkers() function, like this:
/**
 * Load store markers to the visible map area
 * @param {L.Map} map
 * @param {function([Array])} onLoad
 */
function loadMarkers(map, onLoad) {
  const center = map.getCenter();
  const radius = map.getCenter().distanceTo(map.getBounds().getNorthEast());


  const url = API_URL
    + '/api/v1/search?'
    + [
      'q=*',
      'geo_filters[' + LOCATION_FIELD + ']=geo_distance,'
        + radius + 'm,'
        + center.lat + ','
        + center.lng,
      'content_type[]=' + CONTENT_TYPE,
      'limit=' + LIMIT,
      'auth_token=' + TOKEN
    ].join('&');

  fetch(url)
    .then(function (res) { return res.json() })
    .then(onLoad)
}
The most important part of this function is how you should set up the search query, particularly the geo_filters parameter. With the parameters defined above - we will be asking Flotiq's API to provide all locations within a given radius from the center of the map. You can read more about the /search API endpoint in the Flotiq search API docs.
The loadMarkers() function will be used to pass the results pulled from Flotiq's API to the onMarkersLoaded() function, which will then render the location markers. The resulting object will look similar to:
{
    "total_count": 2,
    "count": 2,
    "total_pages": 1,
    "current_page": 1,
    "summary": {
        "aggregations": []
    },
    "data": [
        {
            "item": {
                "id": "Store-516751",
                "City": "London",
                "Street": "50 Chandos Place",
                "Country": "United Kindgom",
                "Location": {
                    "lat": 51.509768,
                    "lon": -0.51105
                },
                "internal": {
                    "createdAt": "2020-09-27T11:43:11+00:00",
                    "deletedAt": "",
                    "updatedAt": "2020-09-27T11:44:14+00:00",
                    "contentType": "Store",
                    "workflow_state": "saved"
                },
                "StoreName": "M & S Newsagents",
                "created_at": "2020-09-27T11:43:11+00:00",
                "updated_at": "2020-09-27T11:44:14+00:00",
                "deleted_at": null,
                "@timestamp": "2020-09-27T11:44:14+00:00"
            },
            "score": 4.1335316
        }
    ]
}
If you defined the Content Type exactly as I did, you'll have the latitude and longitude stored in the item.Location property of each of the entries of the data array.
Now, let's work out how the data should be displayed on the map, once it's pulled.
The onMarkersLoaded() function will be used to put markers on the map.
  /**
   * Register mmarkers for display within the map using clustering group
   * @param {Array} collection
   */
  function onMarkersLoaded(collection) {
    placeCollection = collection;

    for (let i = 0; i < collection.data.length; i++) {
      let store = collection.data[i].item;

      if (!globalGroup) {
        /**
         * if the global clustering group for markers doesn't exist, then create it
         */
        globalGroup = L.markerClusterGroup();
        map.addLayer(globalGroup)
      }

      if (localMarkers[store.id])
        continue;

      localMarkers[store.id] = L.marker([store.Location.lat, store.Location.lon]);

      globalGroup.addLayer(localMarkers[store.id]);

    }

  }
Next, load the markers! Add this, below the onMarkersLoaded definition.
loadMarkers(map, onMarkersLoaded);
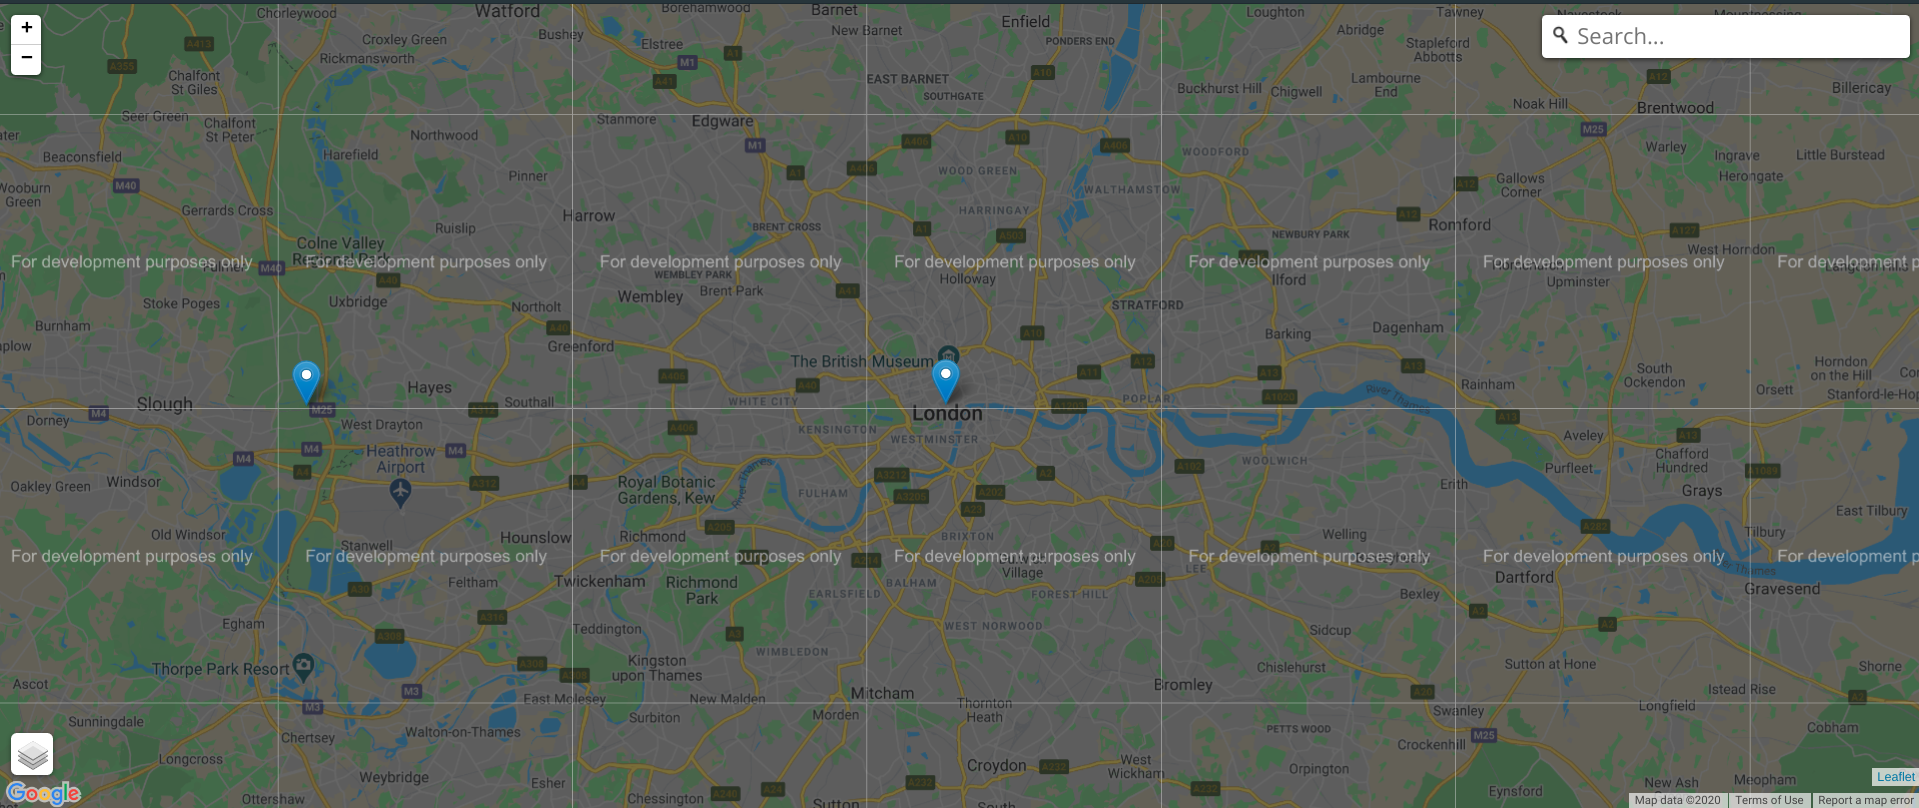
Note
Again - you can verify your progress in 02-pull-data folder in this repo.
Handling events
We will now add several event handlers that will refresh the list of locations when the map is moved or zoomed, and we will enable navigating to the current location, based on Leaflet's map.locate() method.
Add the event handlers:
/**
   * Load data and Handle markers:
   * - after initial loading
   * - after panning
   * - after zoom changed
   */

  map.on('move', function (e) {
    loadMarkers(map, onMarkersLoaded);
    doNotUpdate = true;
  });

  map.on('moveend', function (e) {
    doNotUpdate = false;
    //renderList(placeCollection);
  })

  map.on('zoomend', function () {
    if (!globalGroup){
      return;
    }
    if (map.getZoom() <= CLEAN_MAP_AT_ZOOM && map.hasLayer(globalGroup)) {
      map.removeLayer(globalGroup);
    }
    if (map.getZoom() > CLEAN_MAP_AT_ZOOM && map.hasLayer(globalGroup) == false) {
      map.addLayer(globalGroup);
      loadMarkers(map, onMarkersLoaded);
    }
  });
You can now verify if indeed moving around the map will load new markers. Let's now enable positioning to our current location - once we receive the current point coordinates from the browser - we will update the map's center.
  function getCurrentLocation() {
    // When the browser provides our location
    // move the map to the point provided.
    map.locate({
      setView: true,
      enableHighAccuracy: true,
      maxZoom: 14
    }).on('locationfound', function(data) {
      // Set map center
      currentPoint = {
        lat: data.latlng.lat,
        lng: data.latlng.lng
      }
    }).on('locationerror', function() {
      console.log("Could not find location");
    })
  }

  document.getElementById('currentLocation').addEventListener('click', getCurrentLocation);
We will now need to add a navigation box on top of the map. Add this under <body> in your index.html.
 <div class="container-fluid" style="margin-top: 20px;">
        <div class="row">
            <div class="col-12">
                <div class="search-container" id="search-container">
        <div style="
            position: absolute;
            top: 0;
            right: 0;
            height: 40px;
            width: 40px;
            background-color: #4a4a4a;
        "><a title="Close" class="store-locator-max__toggle--minus" id="hide-button"><span style="
            cursor: pointer;
            height: 2px;
            width: 14px;
            position: absolute;
            margin: auto;
            top: 0;
            left: 0;
            bottom: 0;
            right: 0;
            display: block;
            background: #fff;
        "></span></a></div>
                    <h1>FIND STORES NEAR YOU</h1>
                    <form id="storeSearch">
                            <span id="currentLocation" class="material-icons search-current-location">gps_fixed</span>
                        </div>
                    </form>
                </div>
                <div data-map class="map-container"></div>
            </div>
        </div>
    </div>
and apply the required styling
.search-container {
    background-color: #f0c800;
    color: #FFF;
    width: 600px;
    max-height: 350px;
    padding: 25px;
    position: absolute;
    top: 5%;
    left: 10%;
    z-index: 5000;
}

.search-container.hide {
    width:0;
    height:0;
    background-color:transparent;
}
.search-container.hide h1{
 display:none;
}

.search-container.hide form{
 display:none;
}
A neat, yellow box with a positioning icon should appear in your browser:
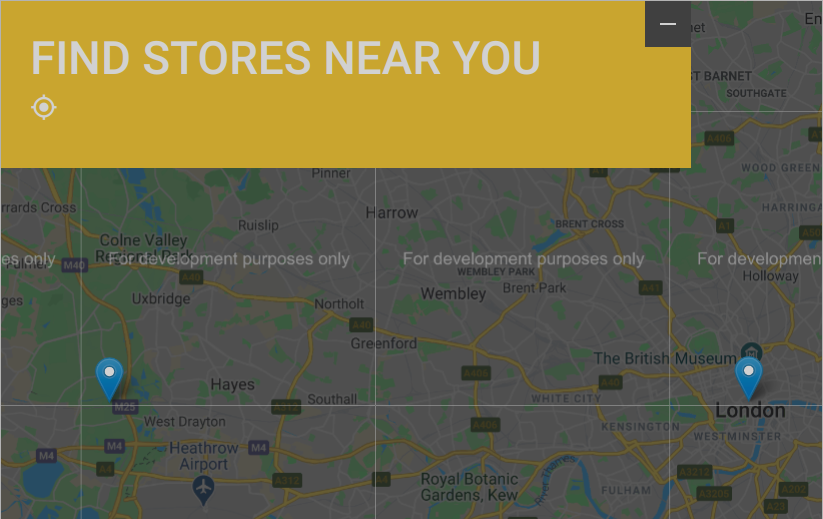
Let's now add an input field and connect the geocoding service to translate location names to coordinates.
Add a text input to the yellow overlay:
<form id="storeSearch">
    <h4>Find by address</h4>
    <div class="form-group">
        <input
            type="text"
            class="form-control"
            name="searchAddress"
            id="searchAddress"
            placeholder="Search by address"
            value="">
    </div>
    <div class="form-buttons">
        <div>
            <button id="submitButton" type="submit" class="btn btn-primary">SEARCH</button>
            <button id="resetButton" type="button" class="btn btn-primary">RESET</button>
        </div>
        <span id="currentLocation" class="material-icons search-current-location">gps_fixed</span>
    </div>
</form>
Now, let's add an event handler on the form's submit event. Once a user submits the form - we will take the address from the searchAdress input and pass it to the geocoding service. The service should then respond with the point coordinates of the address, which we will use to update the map's center.
  const form = document.getElementById('storeSearch');

  form.addEventListener('submit', function(event) {
    event.preventDefault();

    const formData = new FormData(form);
    const address = formData.get('searchAddress');

    searcher.geocode(address, function(response) {

      if(response.length){
        currentPoint = {
          lat: response[0].center.lat,
          lng: response[0].center.lng
        };
        geoCoder.markGeocode(response[0]);
      }
    });

  });
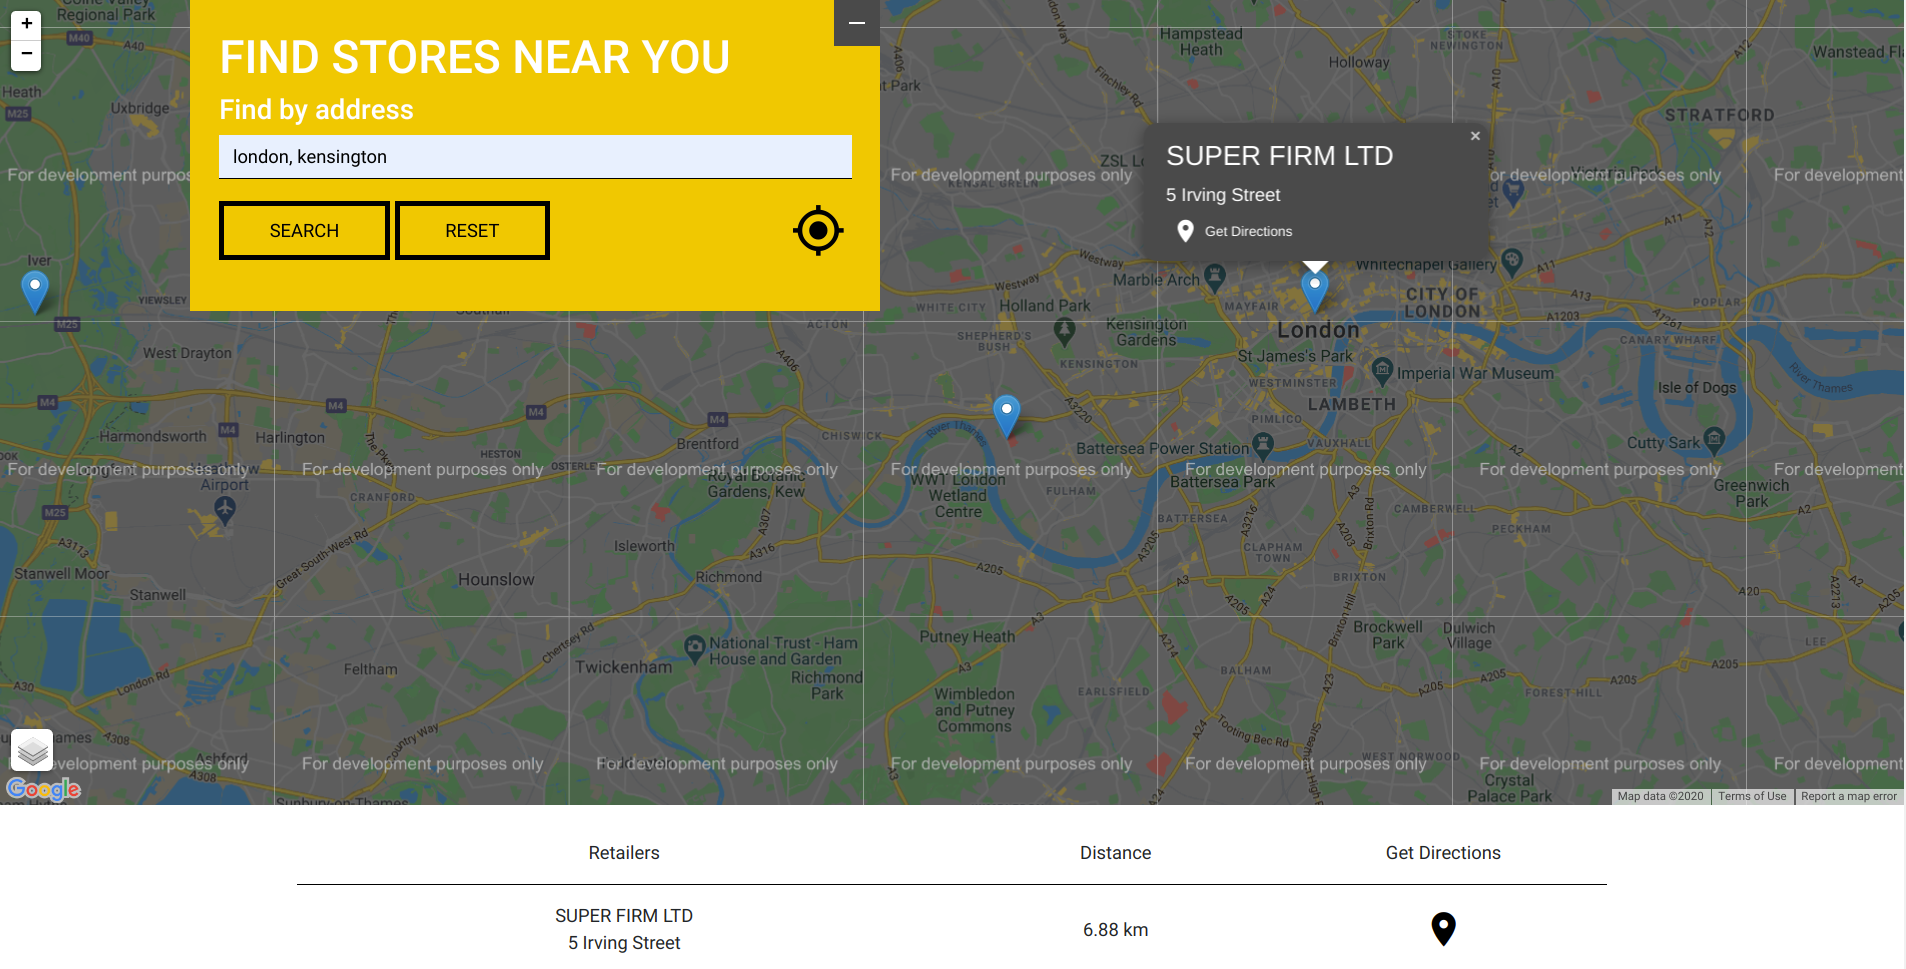
You can now put cities or full addresses in the text input. When you submit the form - your map should automatically move to the address you entered and the nearby stores should load.
Final touches
As a final touch - let's add 2 elements: popovers with store details and a list of stores under the map.
Popovers
Update the onMarkersLoaded() method and replace
localMarkers[store.id] = L.marker([store.Location.lat, store.Location.lon])
with
storePopupHtml = `
<div class="store-name">
${store.StoreName}
</div>
<div class="store-street">
${store.Street}
</div>
<div class="store-directions">
<a class="store-directions__anchor" style="color:white;"
href="https://www.google.com/maps/dir/?api=1&origin=Current+Location&destination=${store.Location.lat},${store.Location.lon}">
<span style="margin-right: 5px;" class="material-icons">location_on</span>Get Directions</a>
</div>`;
localMarkers[store.id] = L.marker([store.Location.lat, store.Location.lon])
.bindPopup(storePopupHtml);
This should provide standard maps popovers if you'd like to give them some extra style - add this to the CSS file and adjust to your needs:
.leaflet-popup-content-wrapper {
    background-color: #4a4a4a;
    color: white;
    width: 300px;
}
Store list
Finally - we will put the list of stores that were found under the map.
Add the container in HTML:
<div class="container store-table" id="storeTable">
    <div class="row store-row">
        <div class="col-6">
            Retailers
        </div>
        <div class="col-3">
            Distance
        </div>
        <div class="col-3">
            Get Directions
        </div>
    </div>
</div>
and the following method, which will populate the list:
function renderList(collection = placeCollection) {
if(!collection) {
return;
}
resetList();
for (let i = 0; i < collection.data.length; i++) {
store = collection.data[i].item;
store.distance = (map.distance({ lat: store.Location.lat, lng: store.Location.lon}, currentPoint)/1000).toFixed(2);
}
/* sort by distance */
collection.data.sort((a, b) => {
return parseFloat(a.item.distance) - parseFloat(b.item.distance);
});
for (let i = 0; i < collection.data.length; i++) {
store = collection.data[i].item;
storeTableHtml = `
<div class="row store-row">
<div class="col-6">
${ store.StoreName }<br>${ store.Street }
</div>
<div class="col-3">
${ store.distance } km
</div>
<div class="col-3" style="text-align: center;">
<a style="text-decoration:none; color:black;"
href="https://www.google.com/maps/dir/?api=1&origin=Current+Location&destination=${store.Location.lat},${store.Location.lon}">
<span style="font-size: 36px" class="material-icons">location_on</span></a>
</div>
</div>
`;
document.getElementById('storeTable').insertAdjacentHTML('beforeend', storeTableHtml);
}
}
and the next one, that will clear the list's contents:
function resetList() {

    const storeTable = document.getElementById('storeTable');
    let lastElement = storeTable.lastElementChild;
    while(lastElement && storeTable.childElementCount > 1) {
        storeTable.removeChild(lastElement);
        lastElement = storeTable.lastElementChild;
    }
  }
and finally - drop this at the end of the onMarkersLoaded() function:
renderList(collection);
That's it! You should now have a fully working webpage, which will display the list of stores you store in Flotiq and will place the stores on a map. Look into our Git repository for some extra style and let us know in the comments when you build something!