Connecting your Flotiq account to Netlify
This article will walk you through the process of connecting your Flotiq account, and your Netlify account. By doing so, you will be able to trigger Netlify builds within Content Objects forms. You will also be able to quickly navigate to your Netlify pages from the Flotiq content editor.
Prerequisites
- Flotiq account
- Netlify account
- Website, sourcing content from Flotiq.
Note
You might want to try one of our starters, which already come with predefined content:
- Recipe website Gatsby starter
- Event calendar Gatsby starter
- Project portfolio Gatsby starter
- Simple blog Gatsby starter
- Gatsby and Snipcart boilerplate, sourcing products from Flotiq
- Snipcart and Next.js, sourcing products from Flotiq
- Snipcart and Angular with Scully, sourcing products from Flotiq
- Simple blog using Angular with Scully
These starters all come with detailed READMEs and a one-line content import command, be sure to check those!
Signing in to Netlify
If you do not have the account, the easiest way to create the account and use with this tutorial will be using GitHub on Netlify sign up page. Netlify will ask you to authorize with your GitHub account. If you need to request access to one or more repositories, you can click "request access" here or later, when creating an instance.
Once signed in, configuring Netlify with Flotiq requires several steps. We will walk you through them below.
Creating an instance
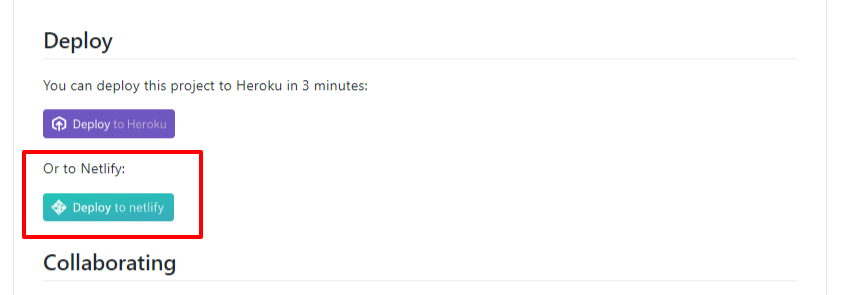
Once you've authenticated with Netlify and GitHub, you have two ways of creating the site in Netlify. The first and faster way is to use the Deploy to netlify button on the bottom of Readme in every starter repository provided by Flotiq team:
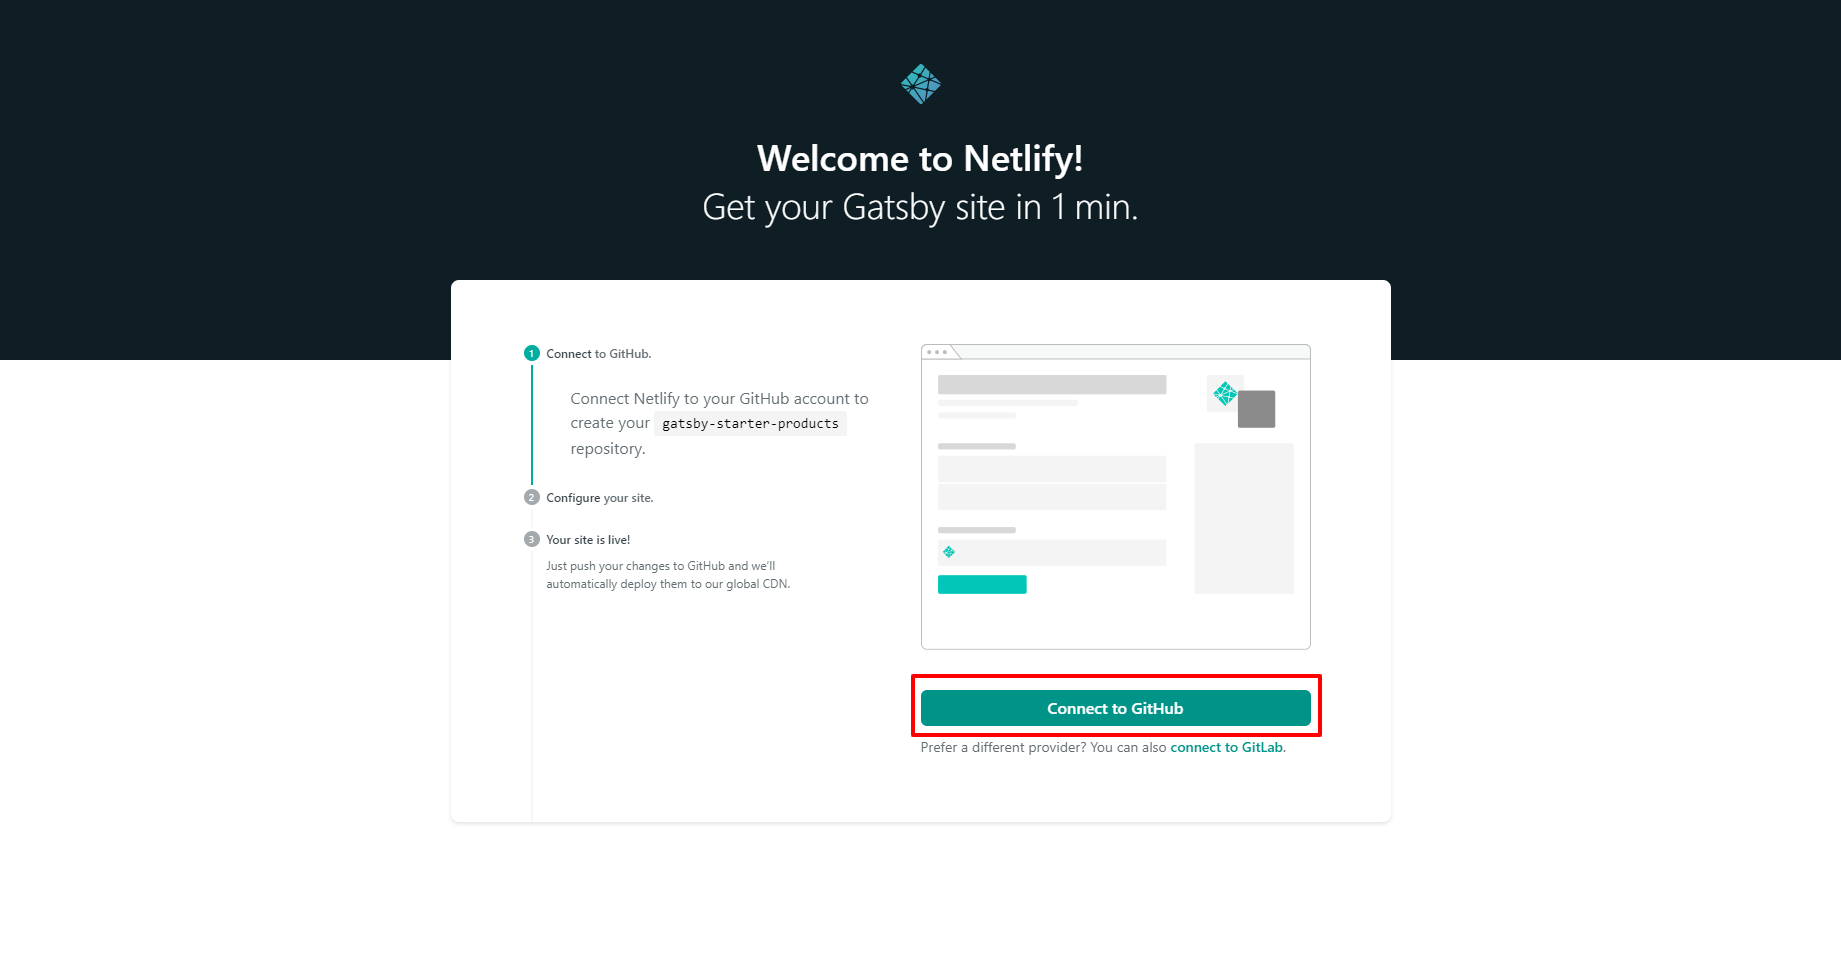
then click Connect to GitHub button:
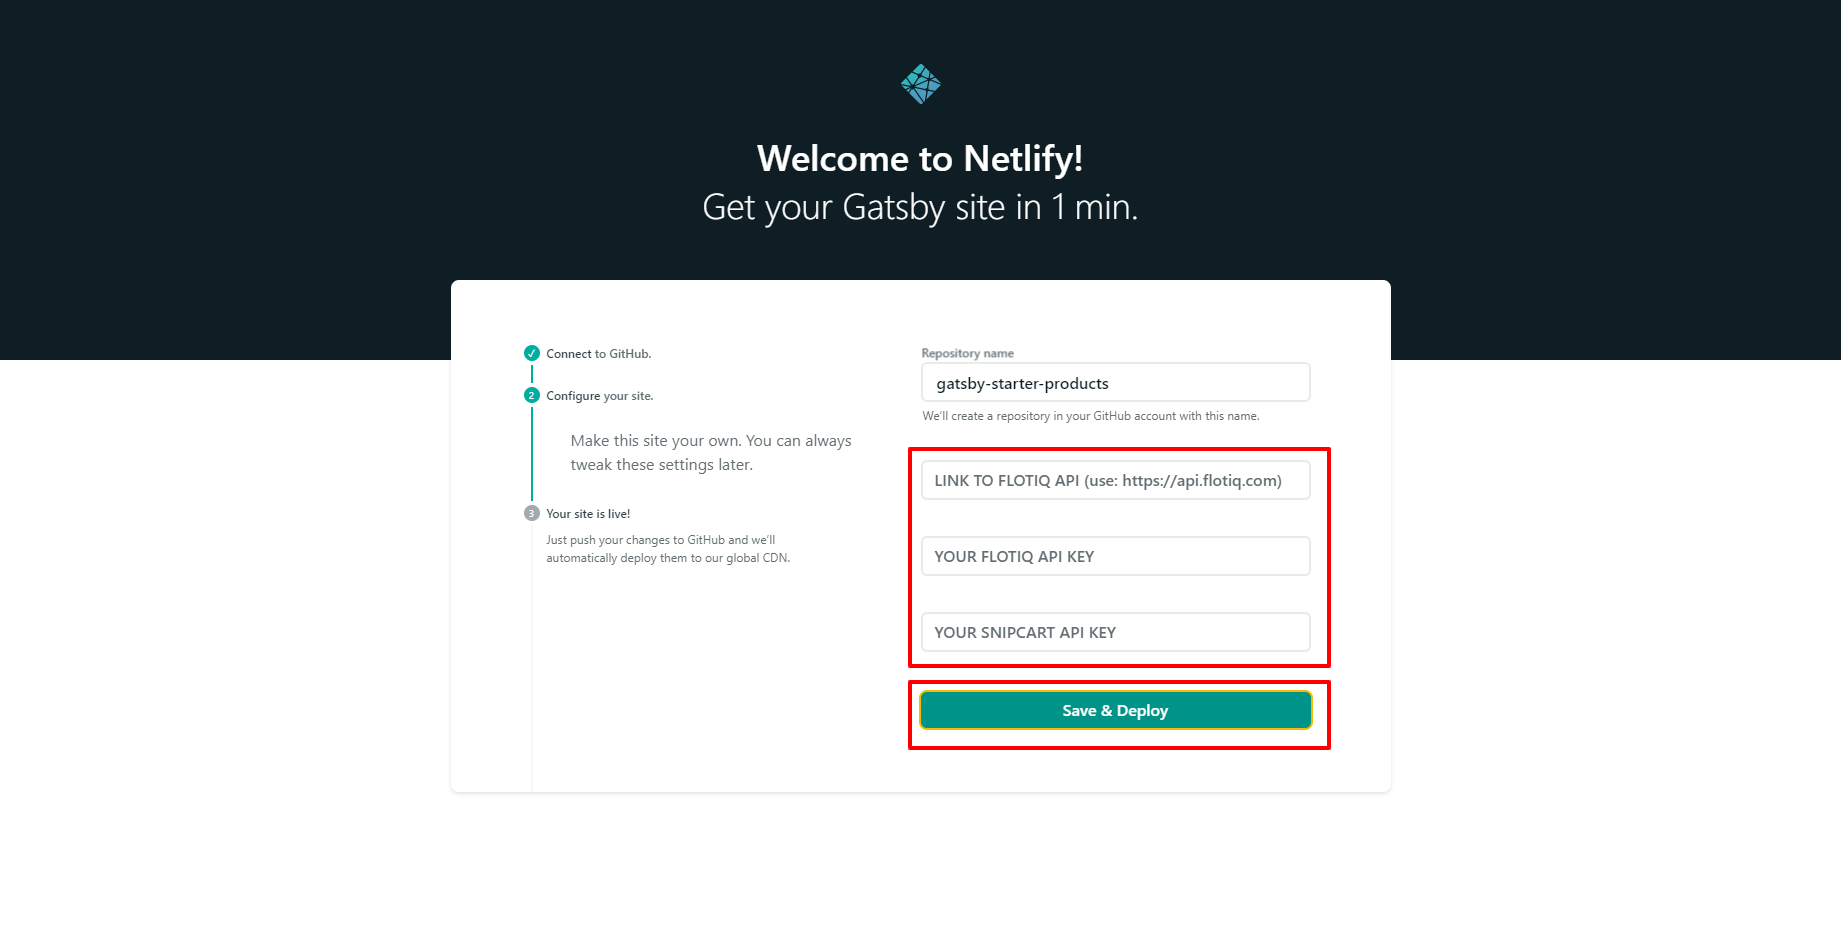
insert environment variables (more below) and click Save and Deploy, after few minutes, your page should be live:
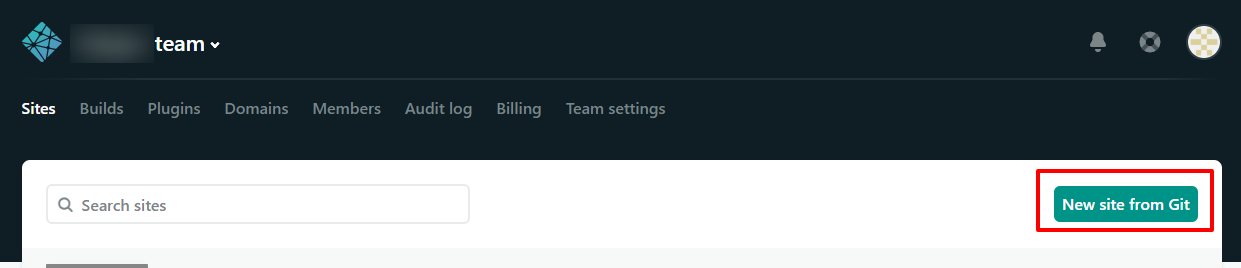
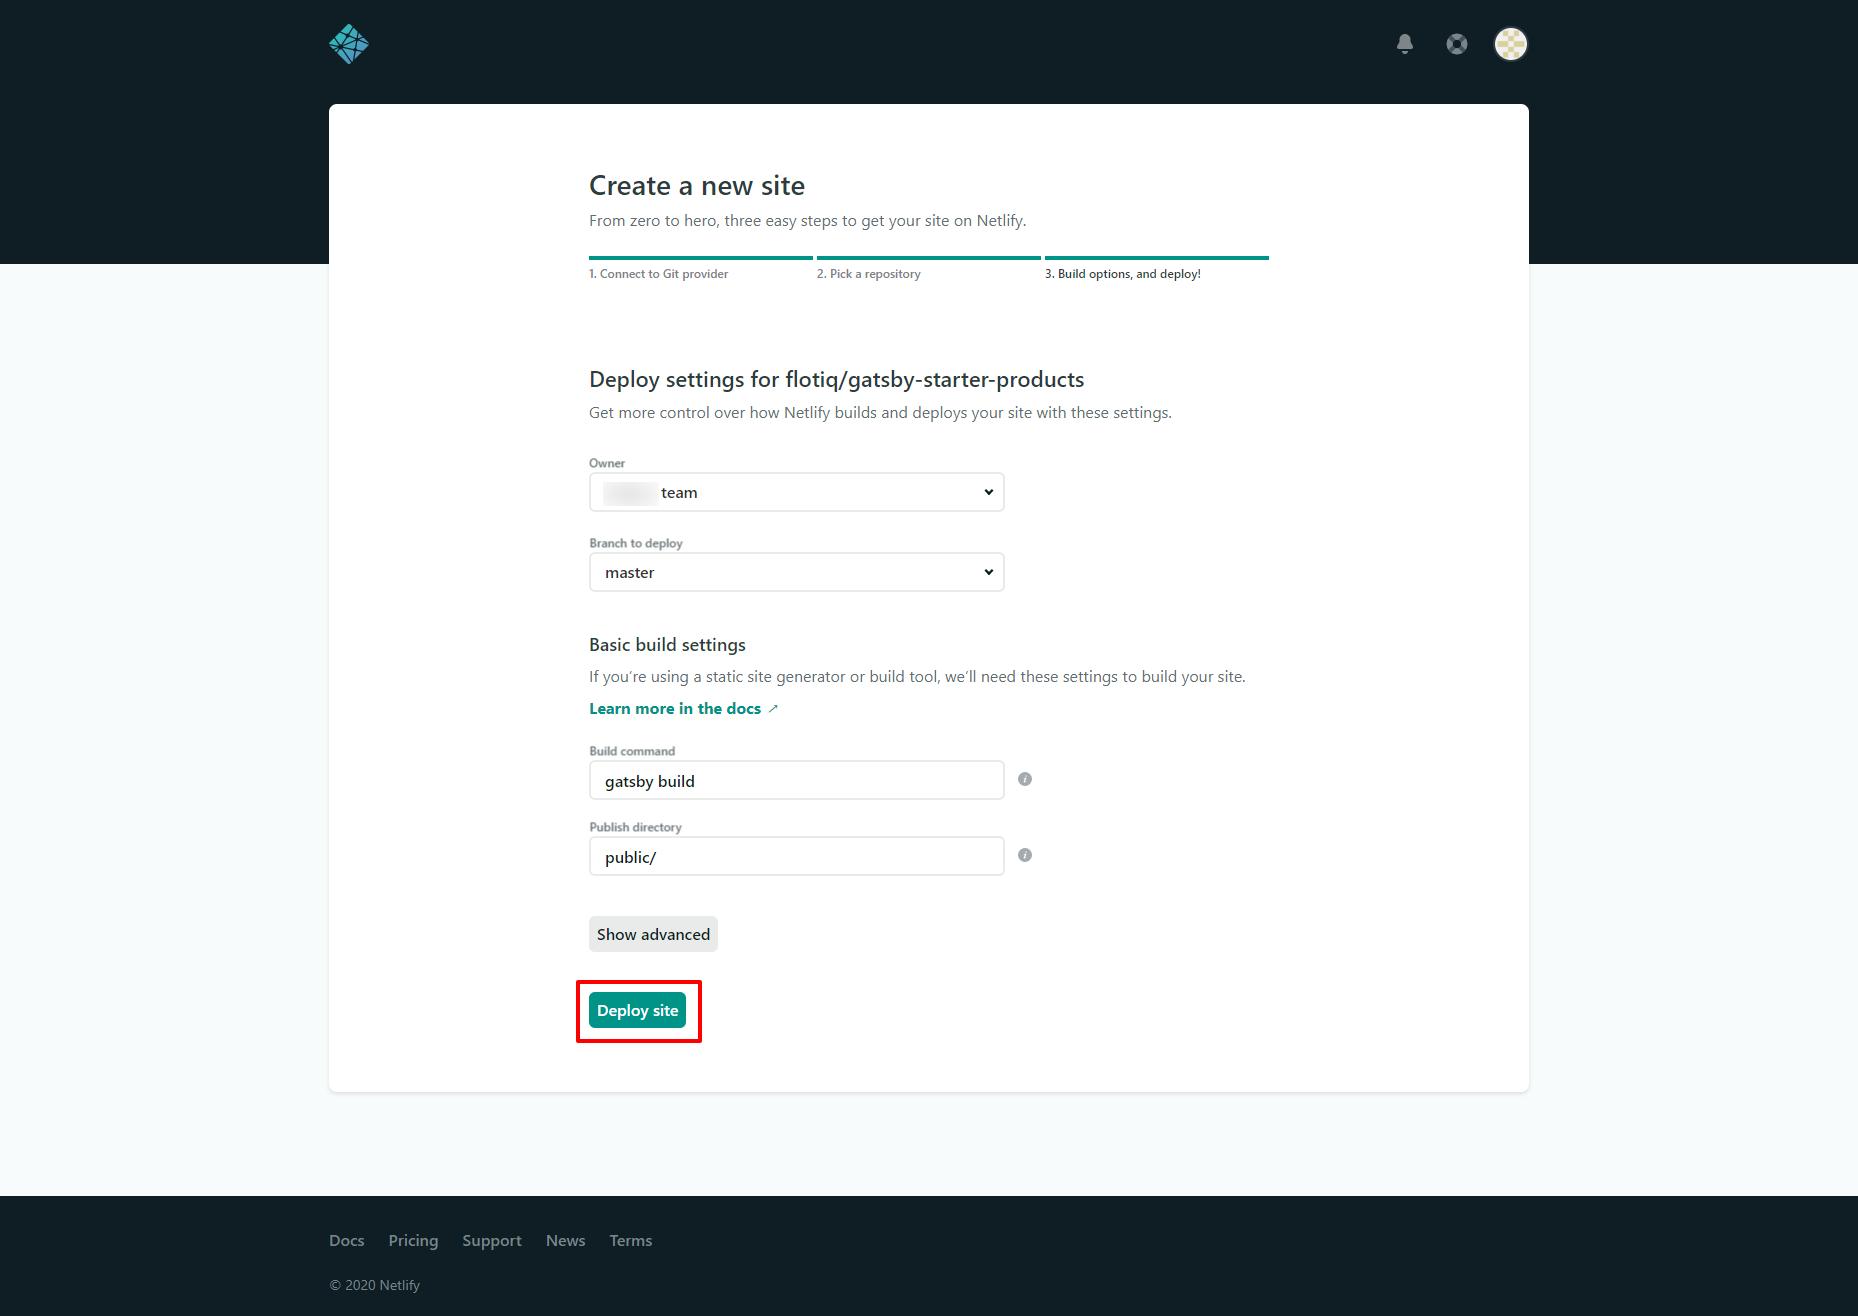
The second way is to click the New site from Git button in Netlify dashboard:
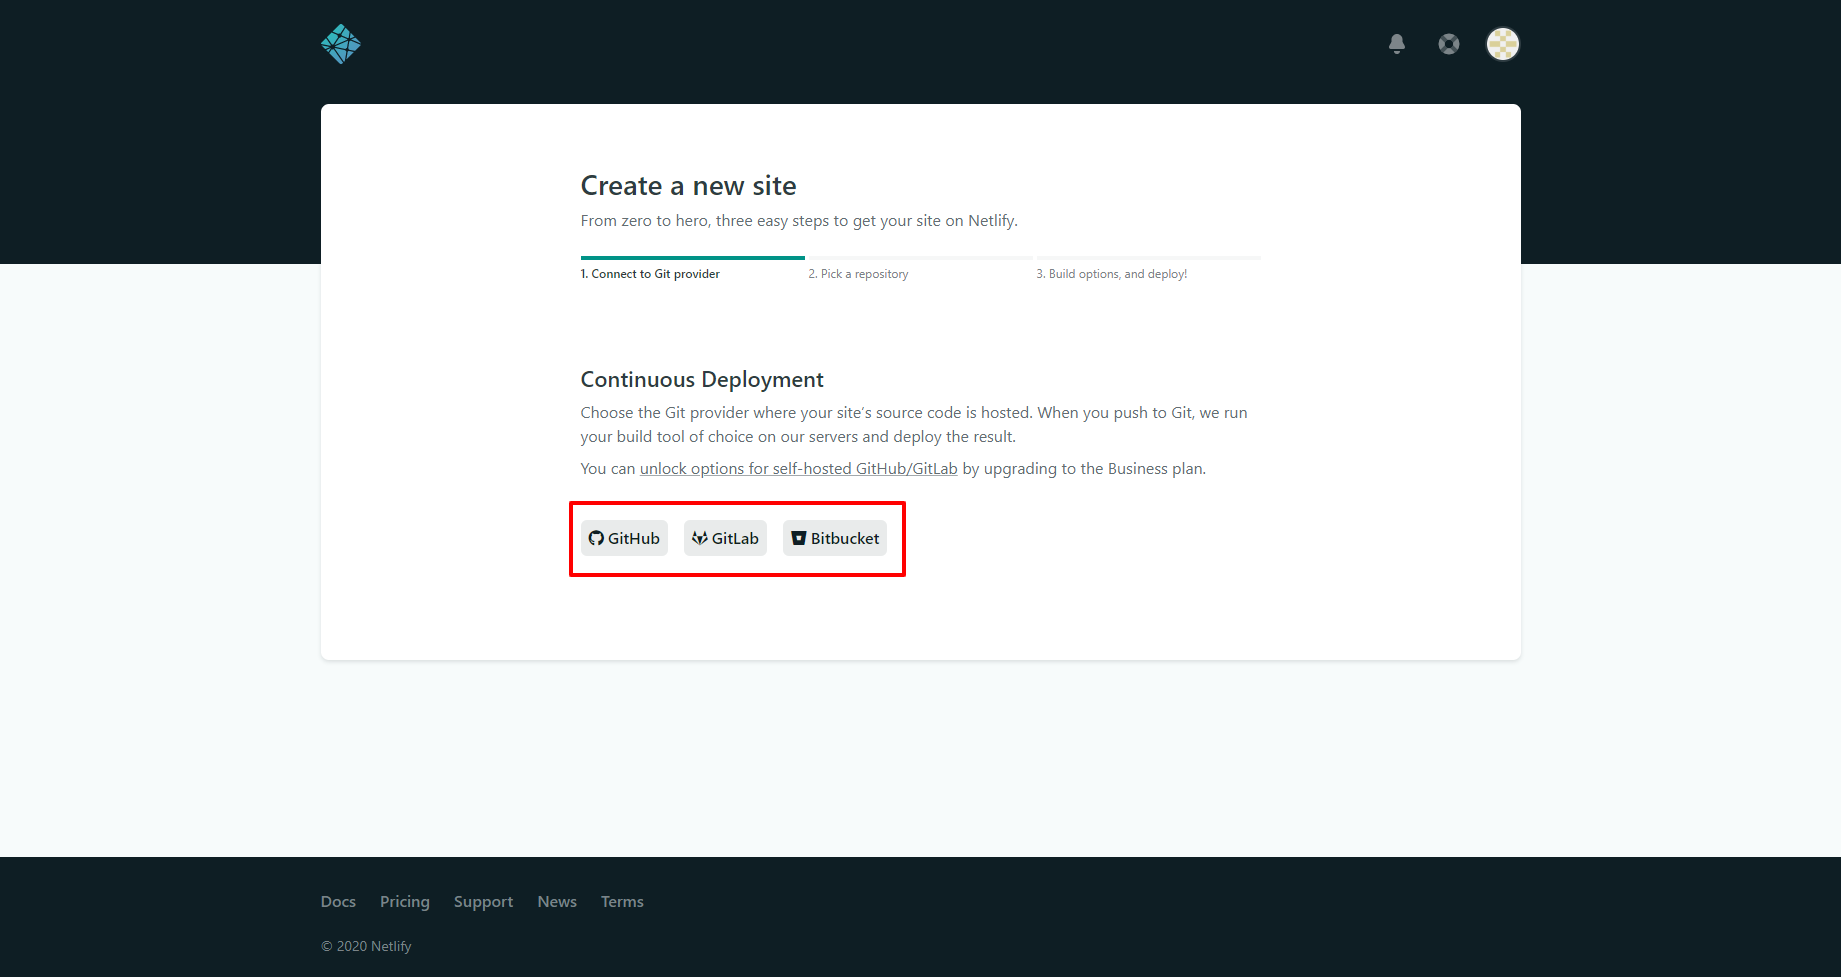
then choosing the source of code:
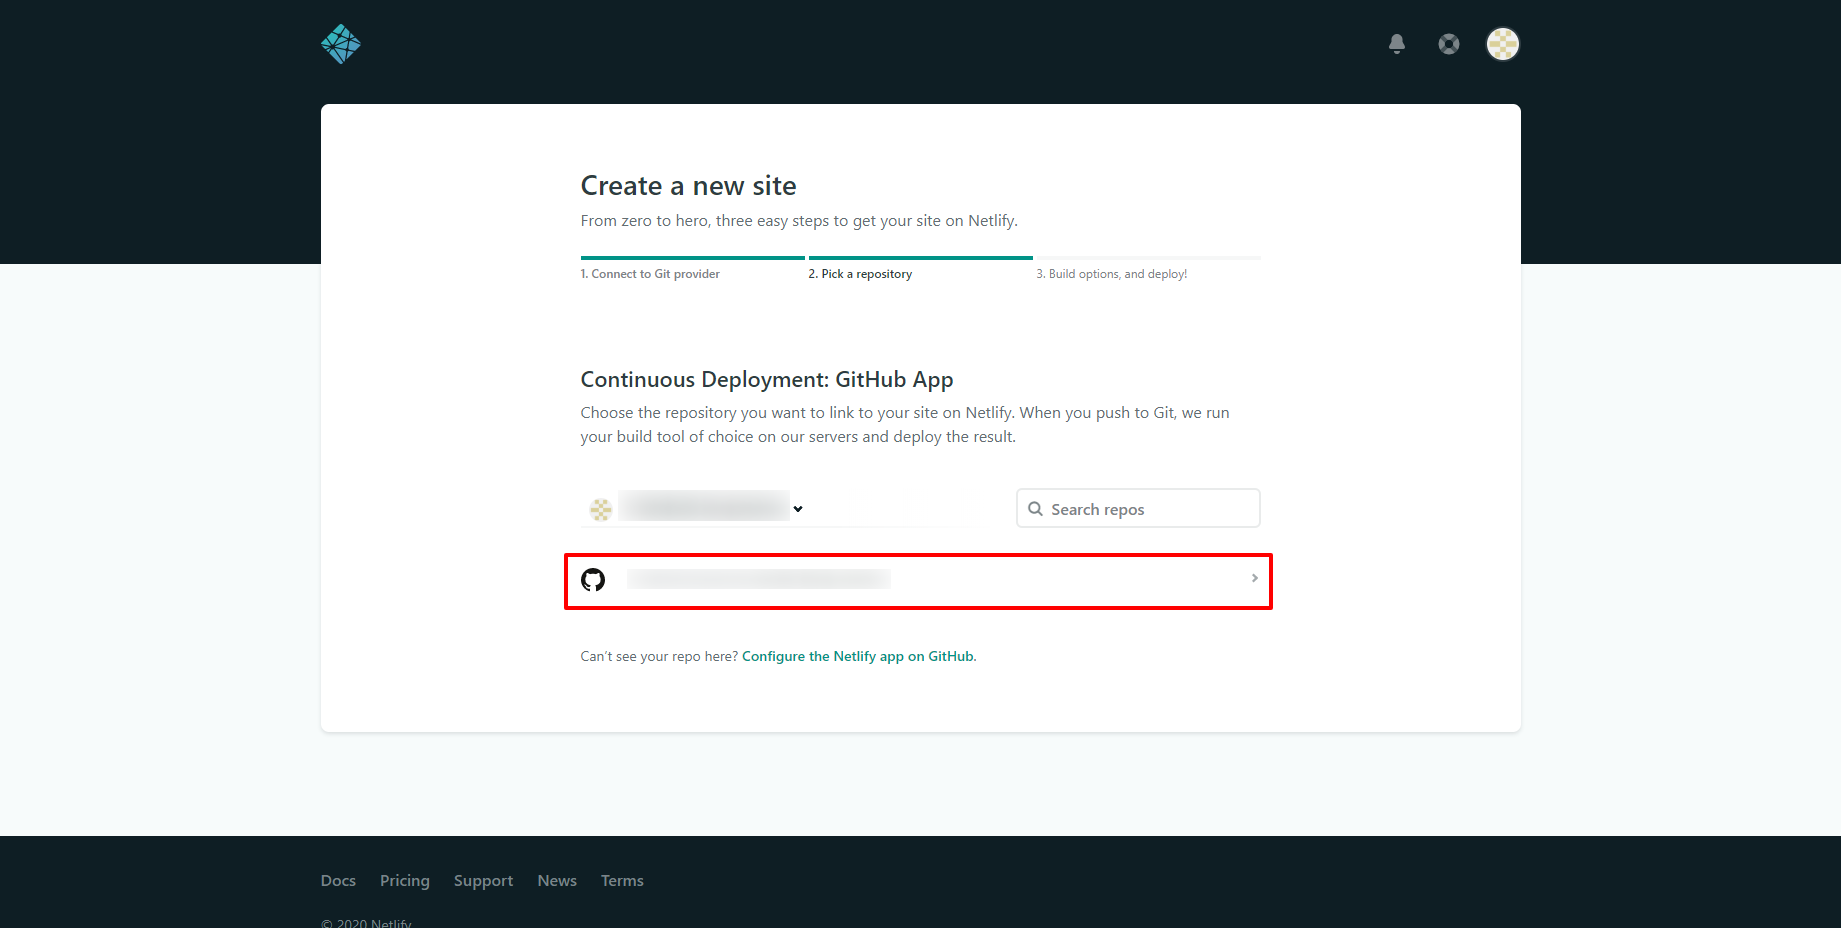
and the desired repository:
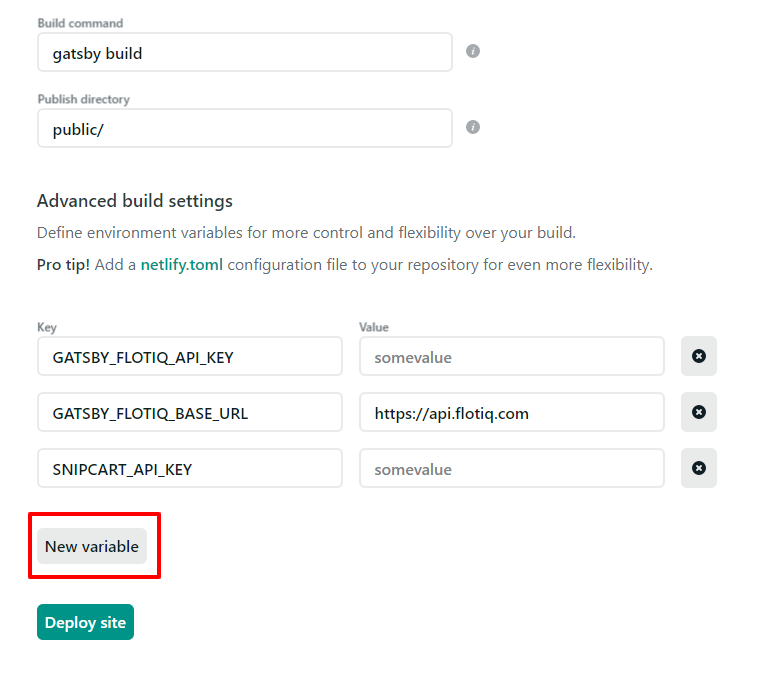
next step is to manually put environment variables required by project, first click Show advanced and then New variable for every variable (more below):
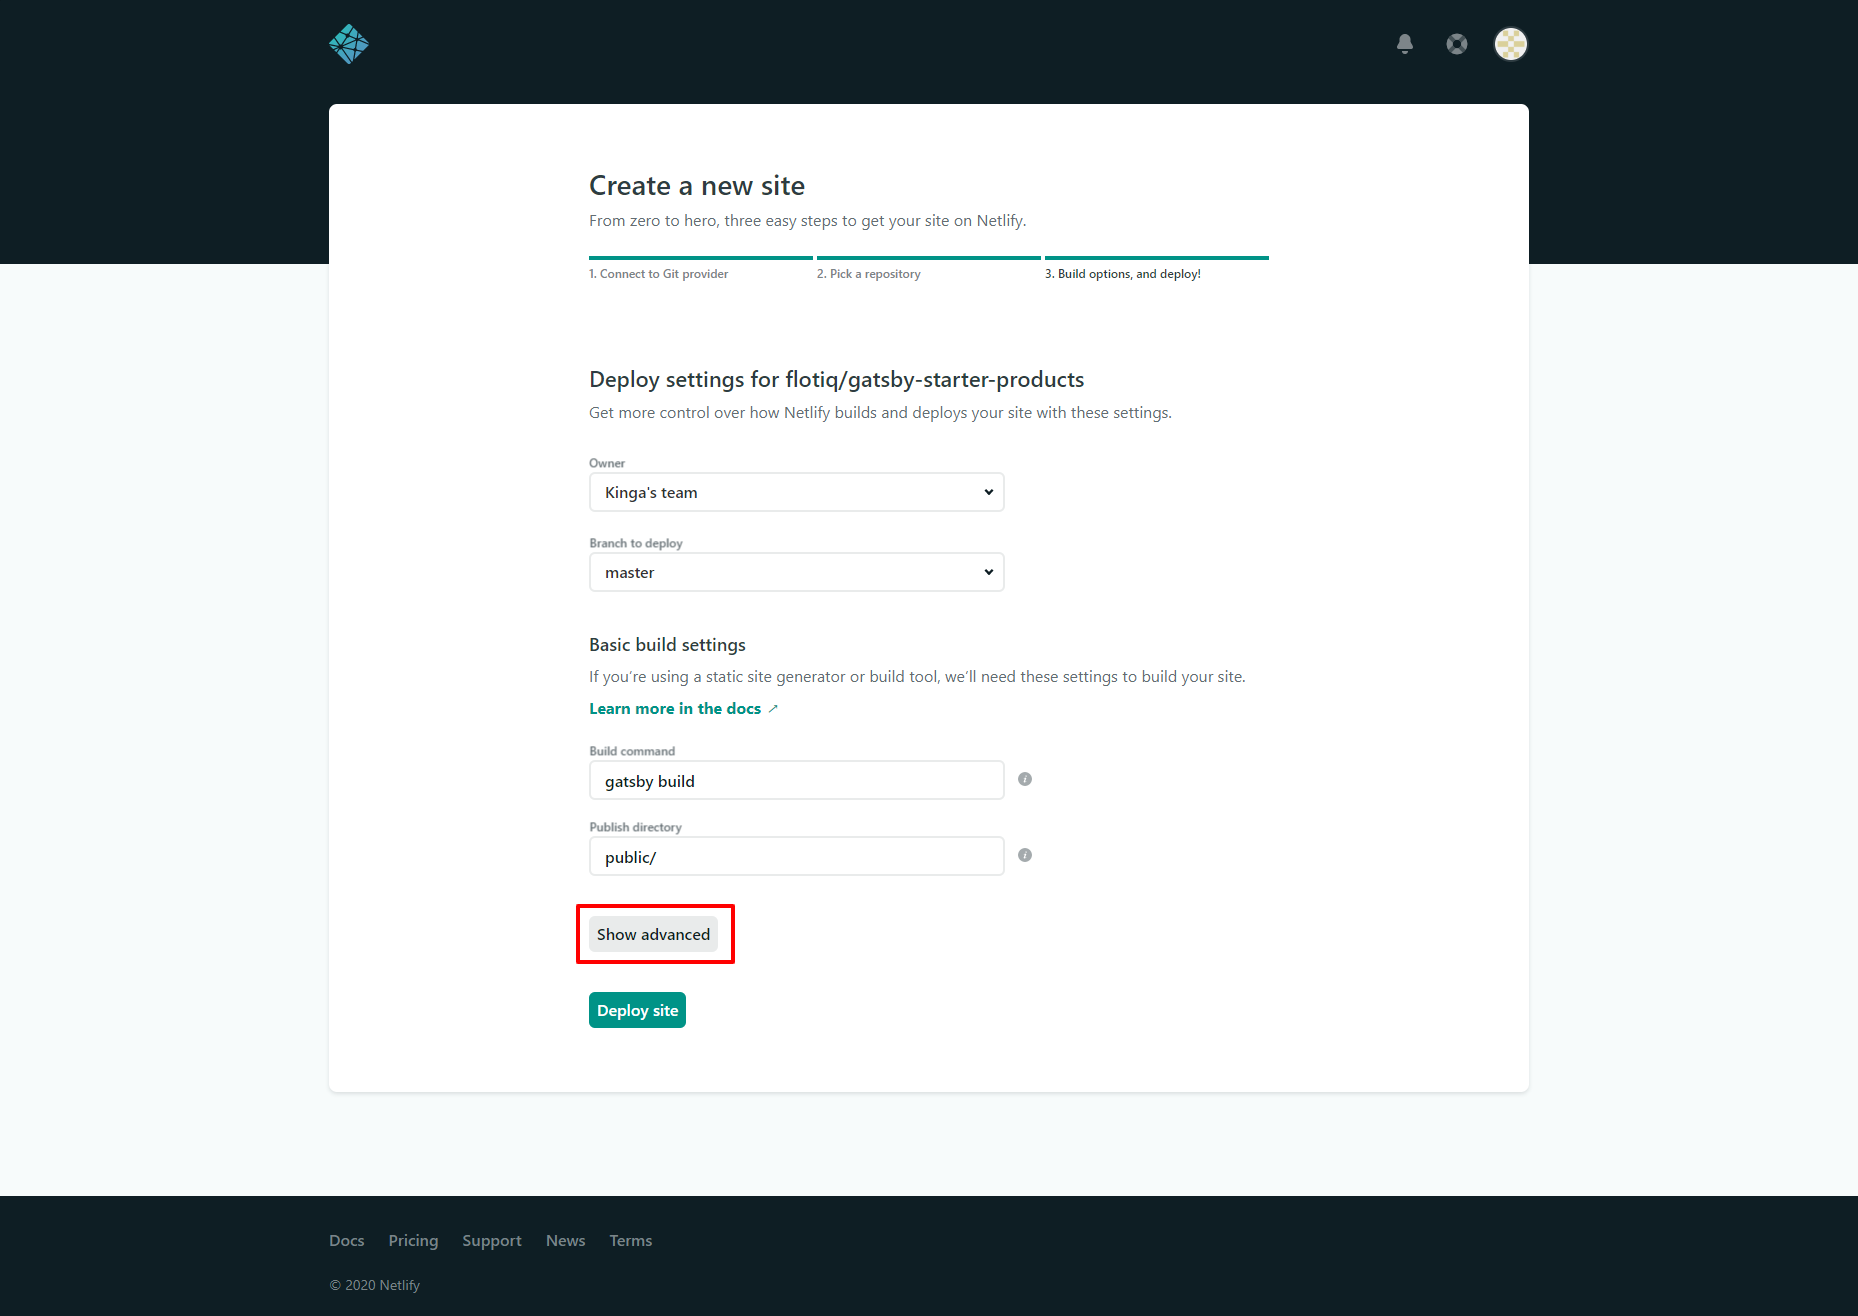
and last but not least click Deploy site button, after few minutes, your page should be live:
Setting up Environment Variables
An environment variable references a value that can affect how running processes will behave on a computer, for example, in staging and production environments. You must save environment variables in Netlify to authorize your instance to pull source data from Flotiq.
The essential two environment variables needed for every Gatsby project are GATSBY_FLOTIQ_API_KEY and GATSBY_FLOTIQ_BASE_URL. In some cases, you will provide additional env variables for your application to work.
For example, if you're using the Gatsby and Snipcart starter you will also provide the Snipcart API key. The project Readme always describes the needed variables.
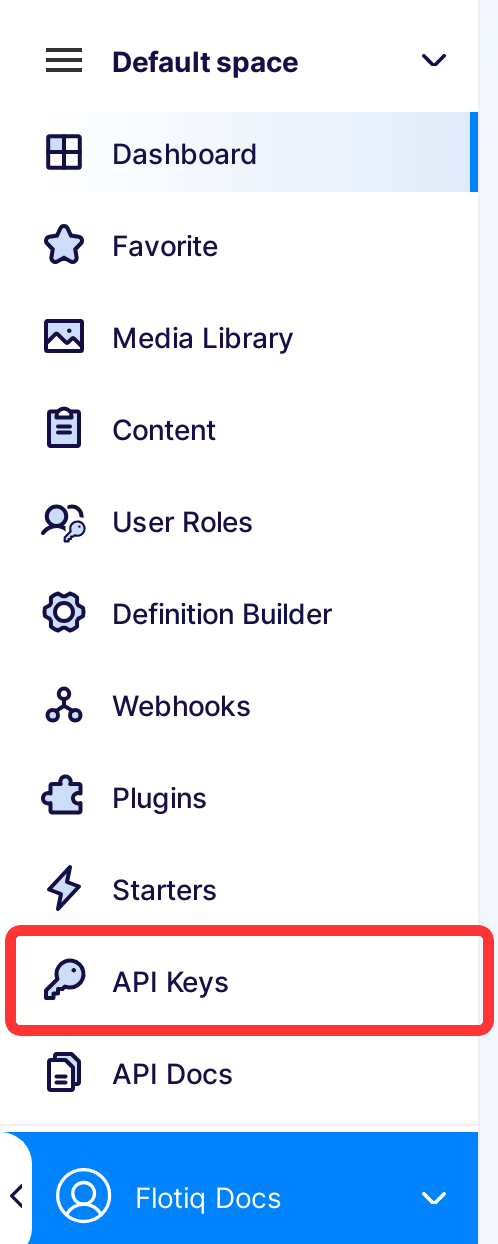
To obtain the Flotiq API key - in your Flotiq account, Find in the right sidebar panel Api keys and select:
You can either select the application-wide read-only key:
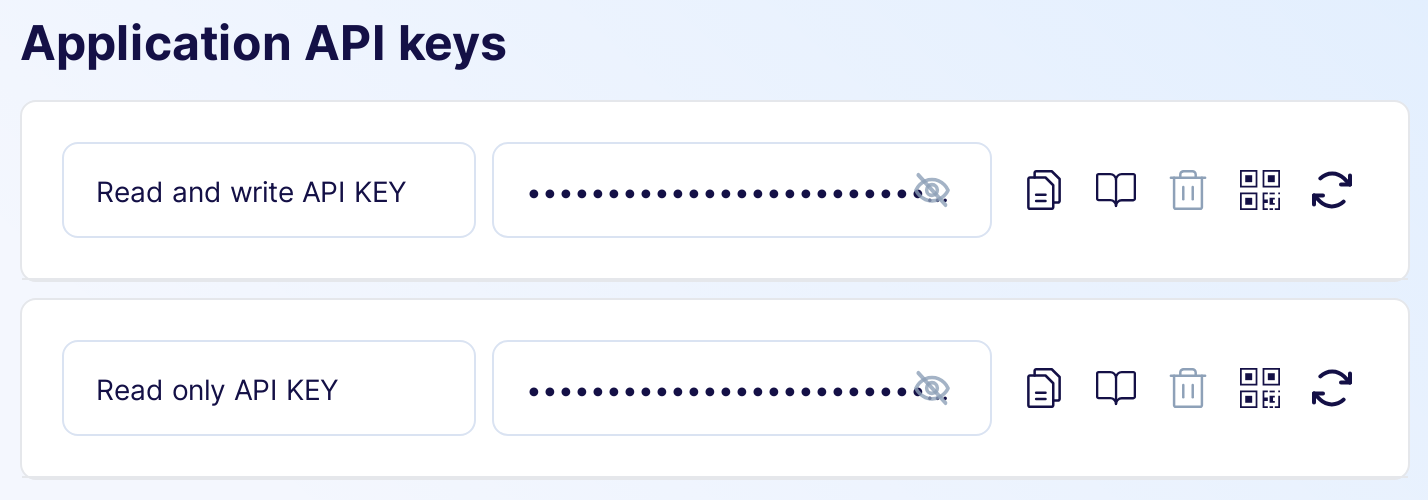
Or as a safer option, create a scoped read-only API key that will only be used for the purpose of Netlify build, read more about Flotiq API access.
Copy the Read-Only key and paste it in Netlify settings as GATSBY_FLOTIQ_API_KEY. For the GATSBY_FLOTIQ_BASE_URL put https://api.flotiq.com.
Note
Flotiq doesn't enforce any particular way of selecting drafts or non-public versions of your pages. The Read-Only key you copied will give you access to all your content. If you'd like to set up draft and public versions of your pages - you can do so by adding an extra field to your content types and querying for it in you GraphQL queries.
Installing the Netlify plugin
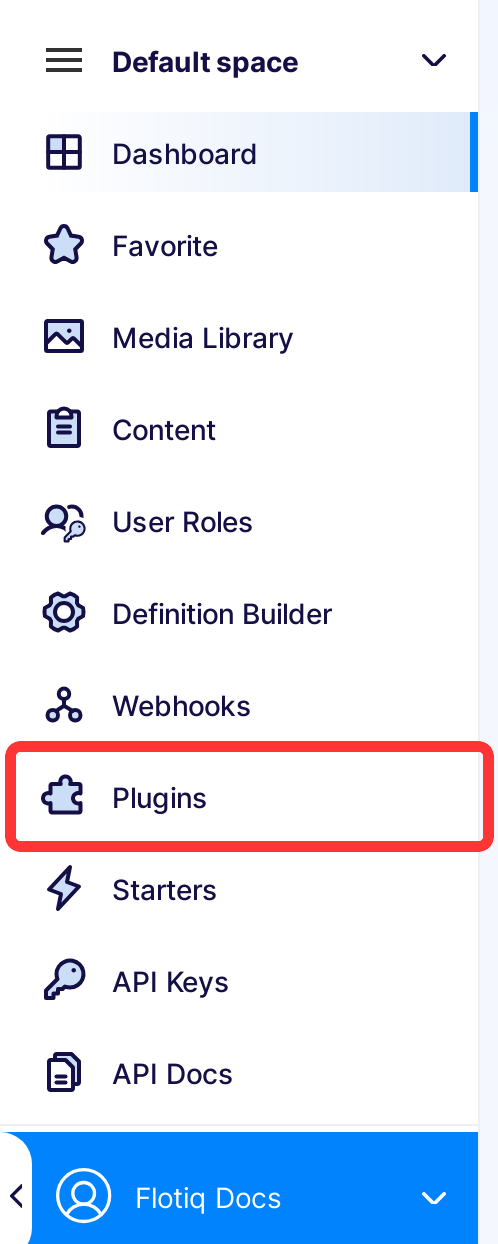
Find in the right sidebar panel Plugins and select
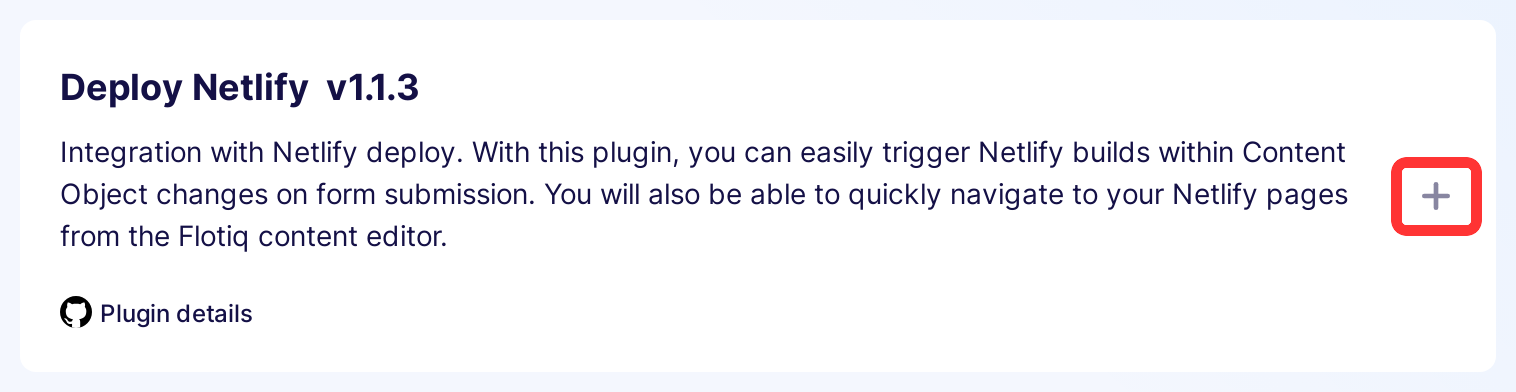
On the next screen, click the plus next to Netlify Build to install the plugin.
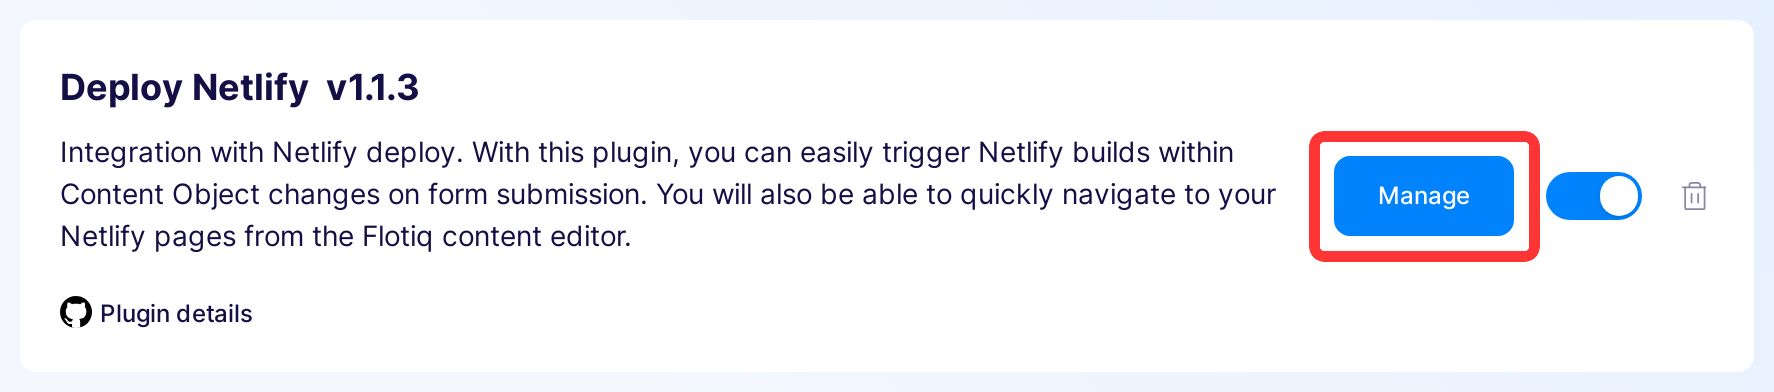
Once the plugin is enabled, click Manage to open the modal with the form.
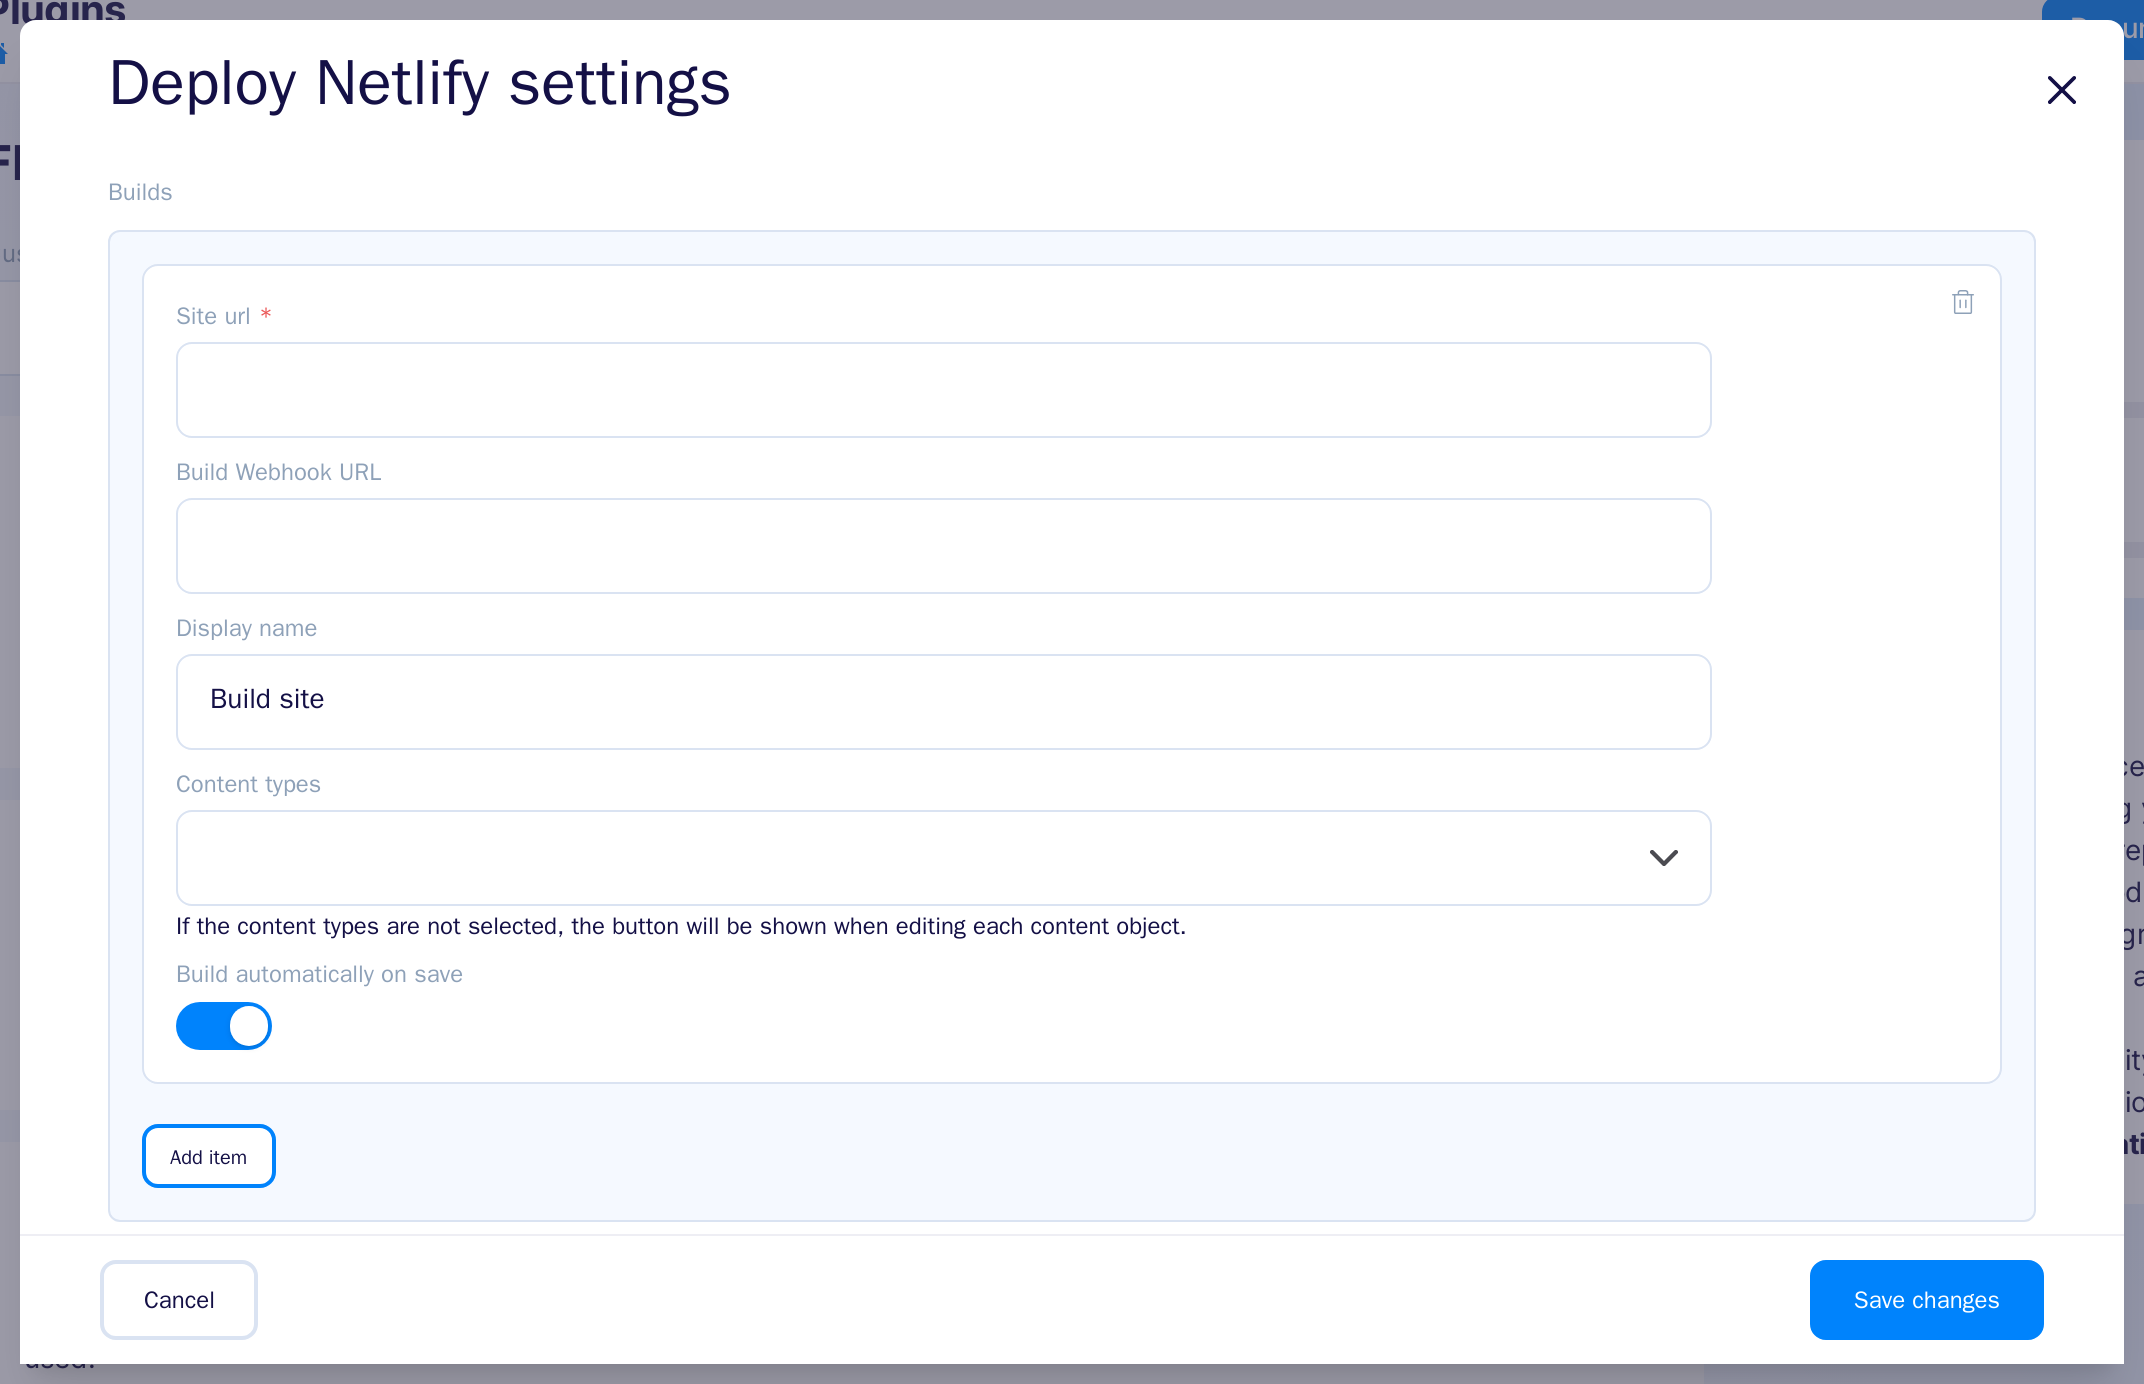
After the modal is opened, click Add item. Next - fill in the details from your Netlify account and click Save changes to finish your Netlify Build set up.
Note
With the Build automatically on save option user can switch between direct update on save or only when manually clicking on Build site button in Content Objects forms.
Inside Site url , Build Webhook URL or Display name inputs there can pass some placeholder keys from Content Object form.
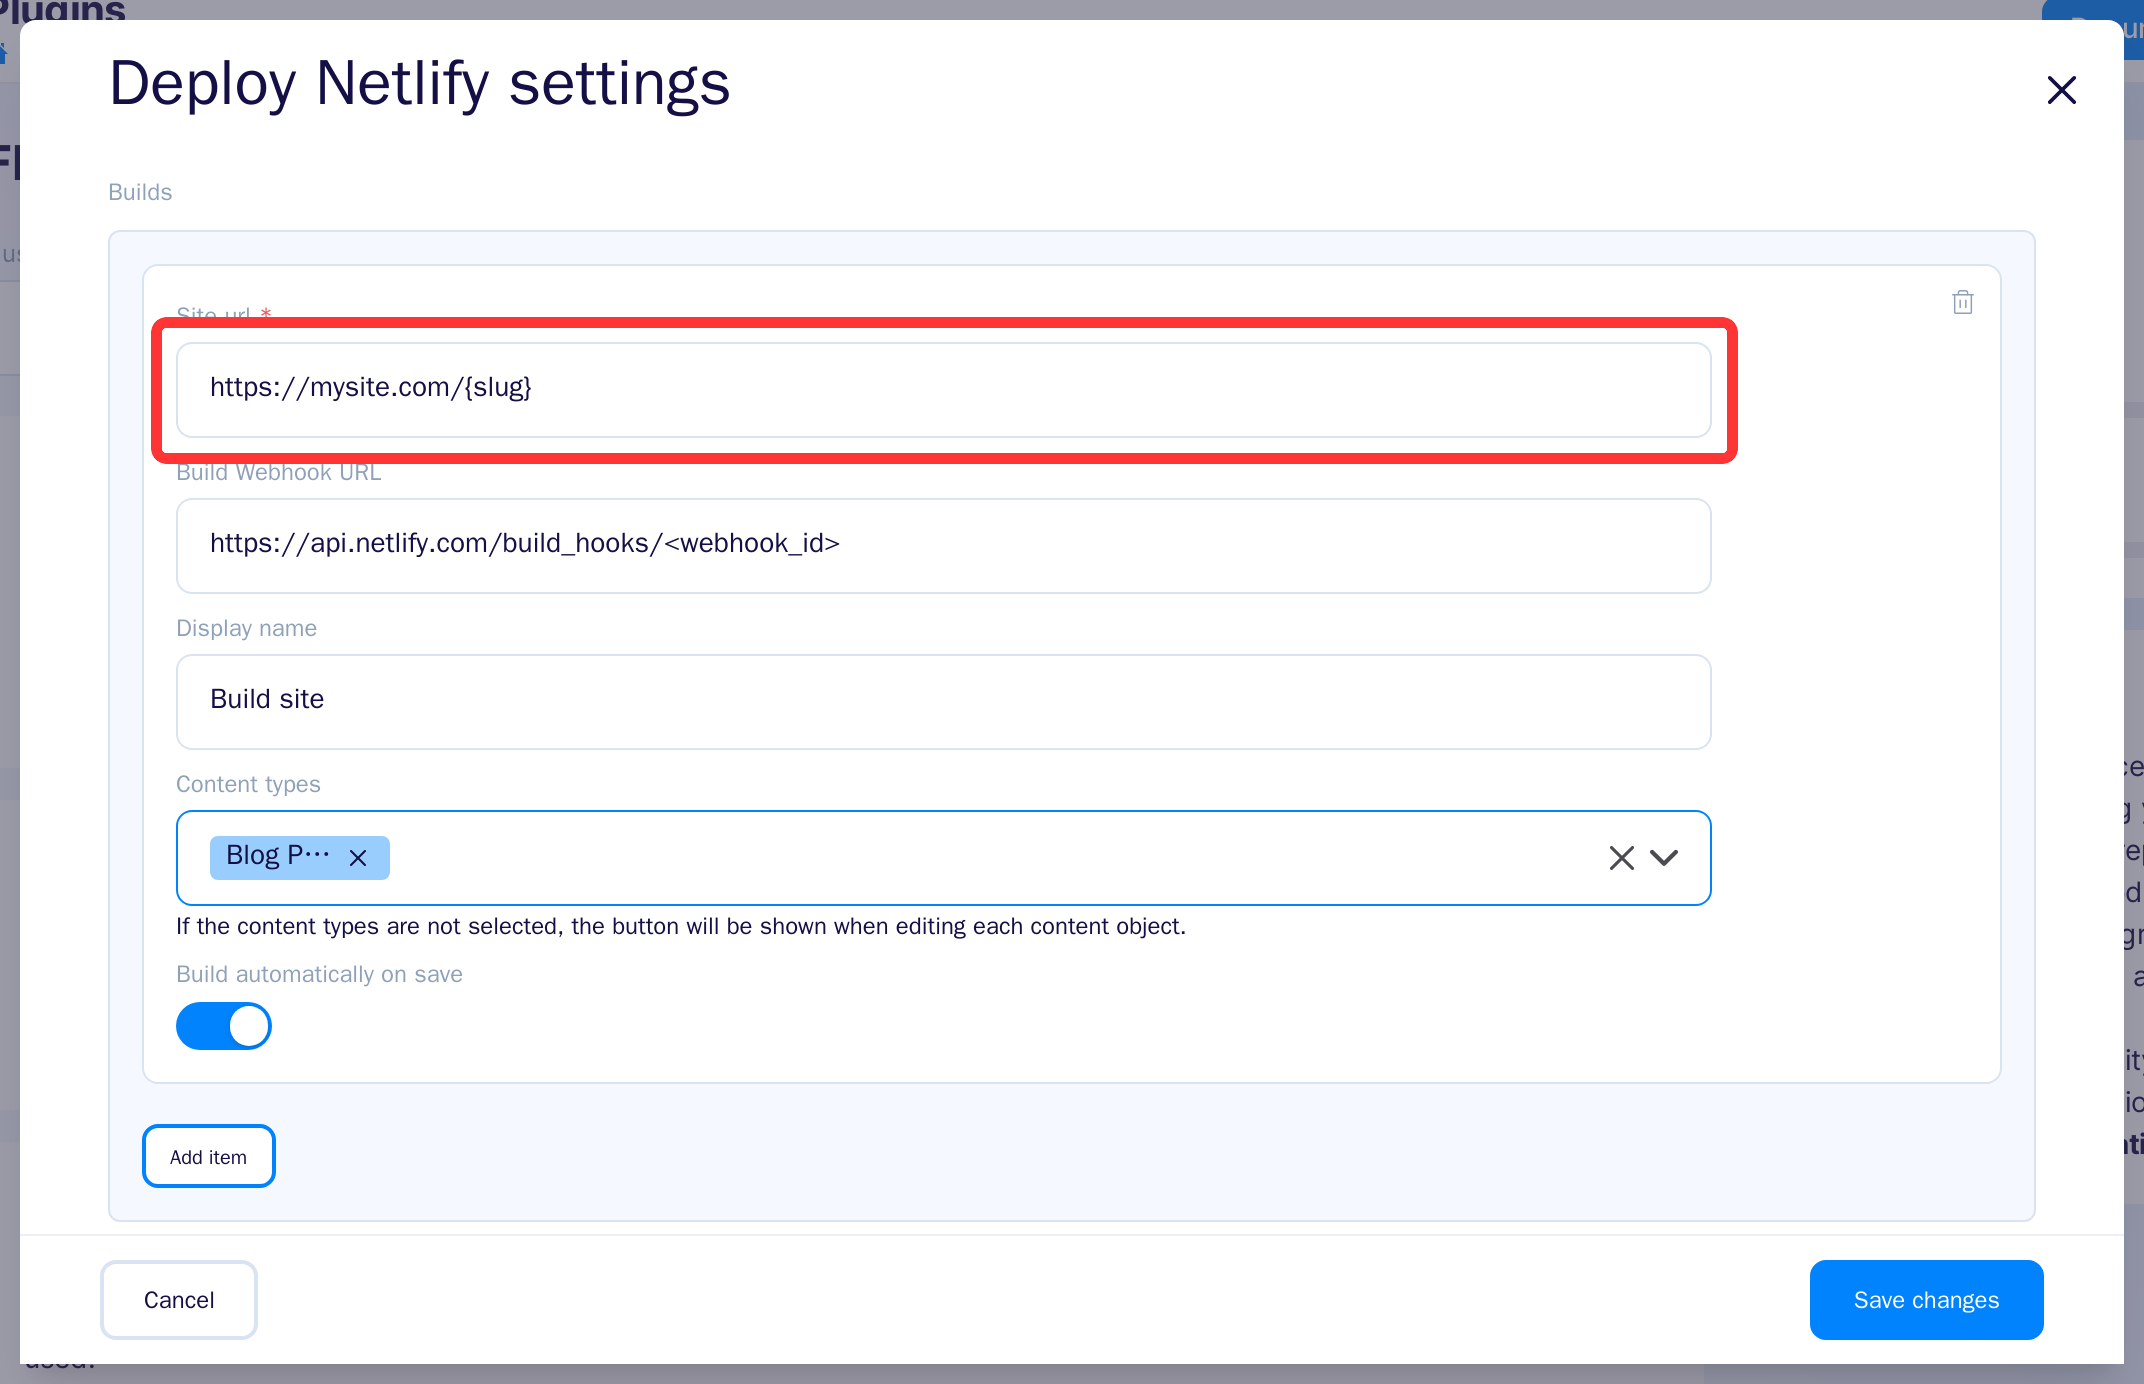
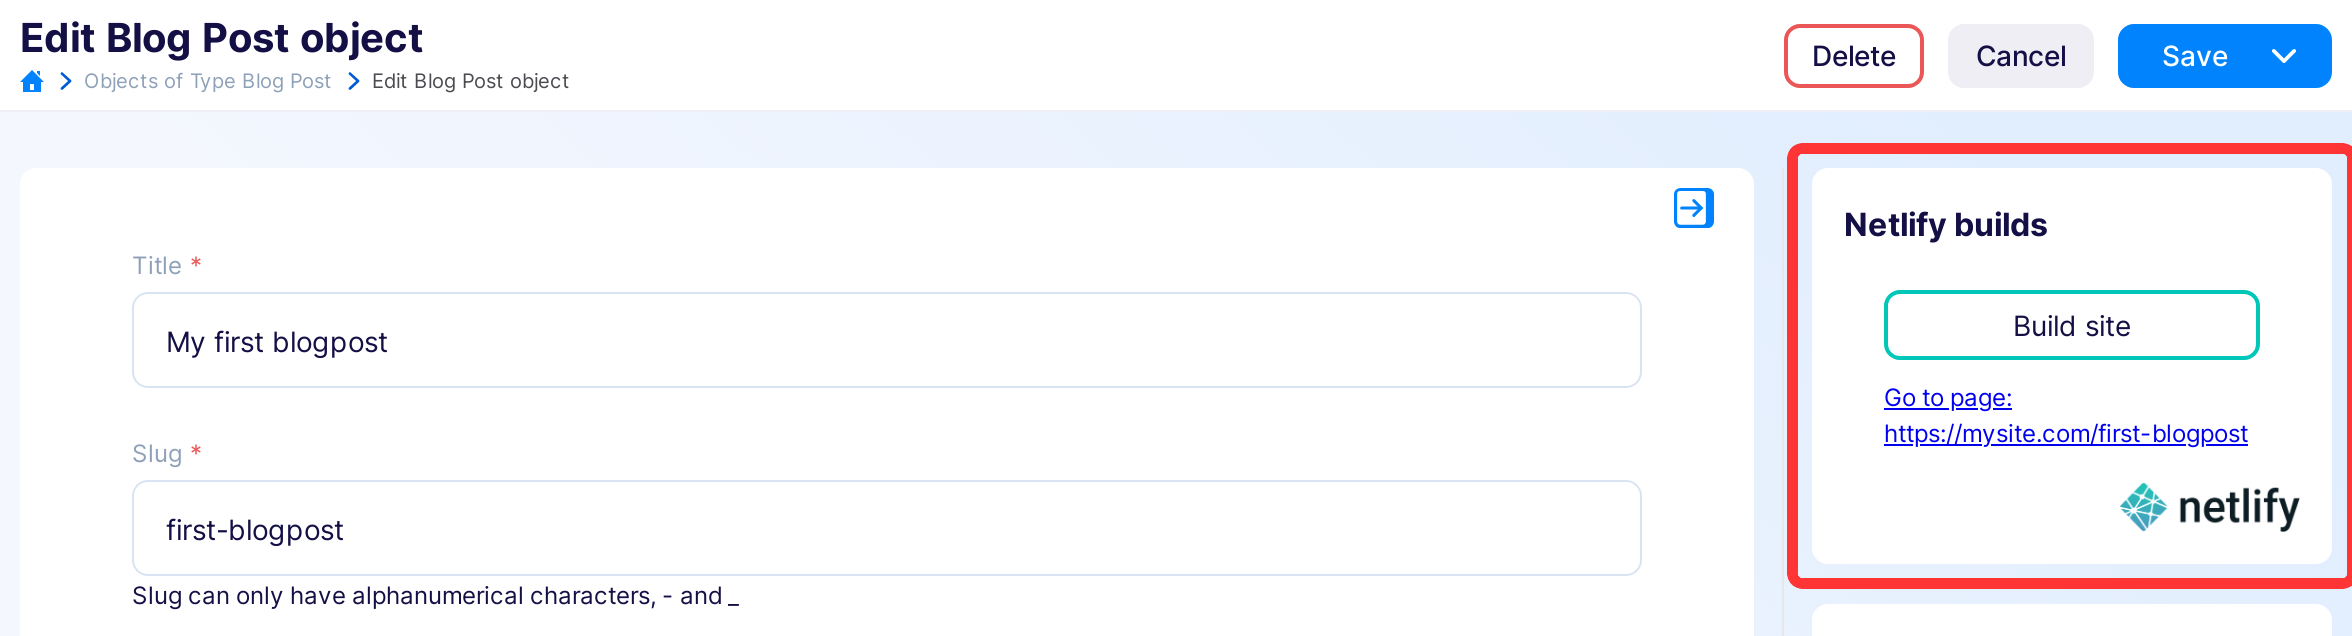
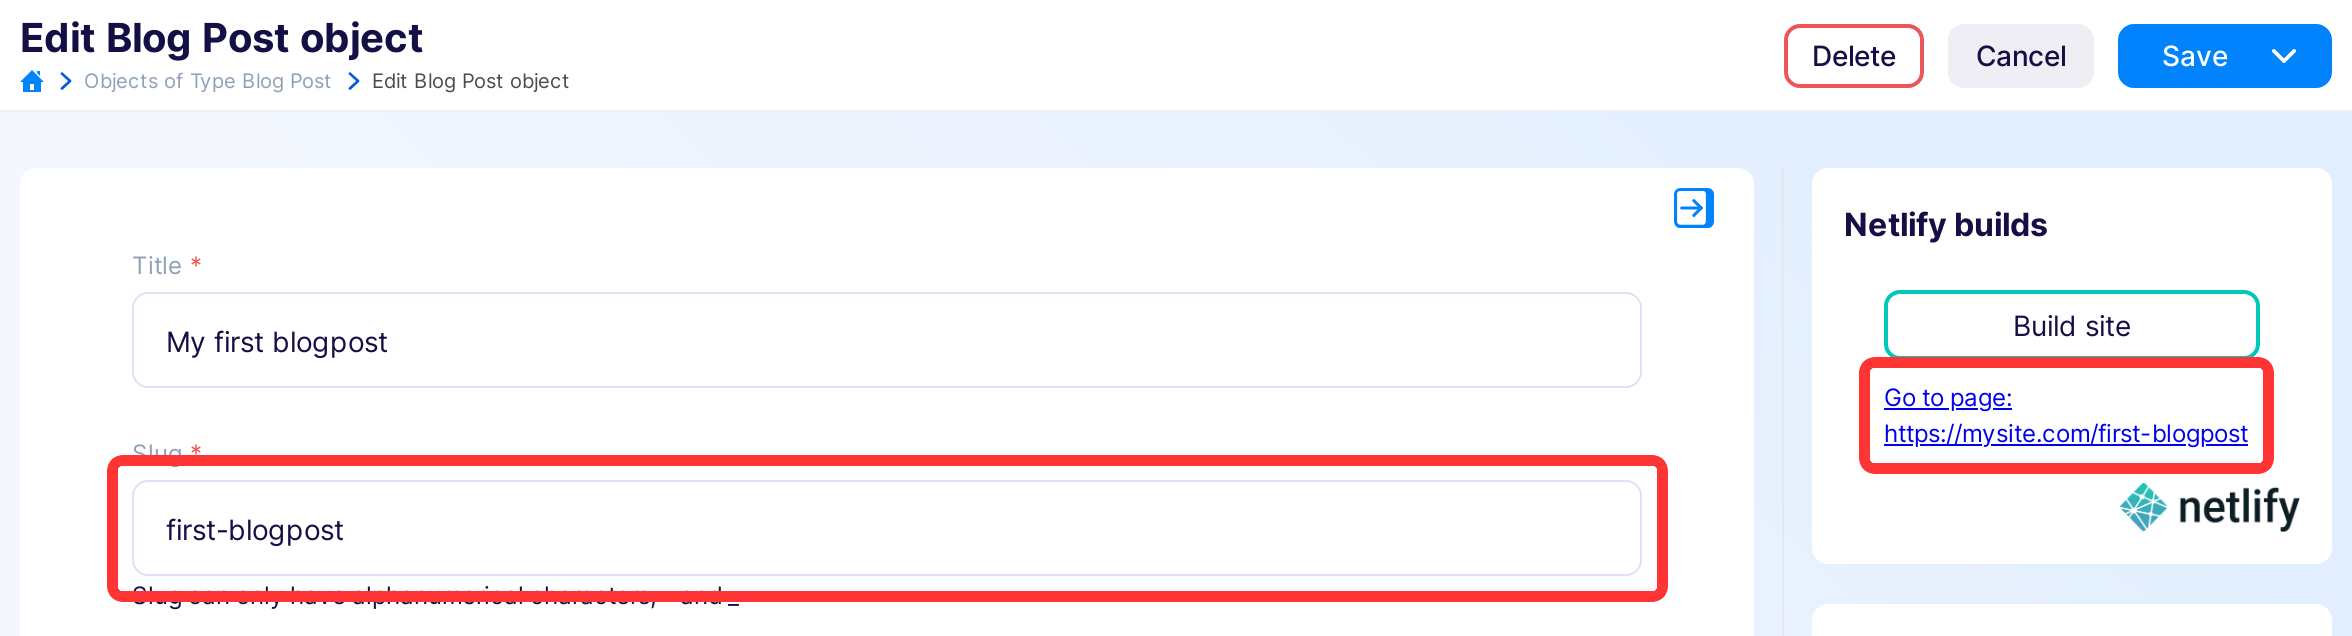
You will see the Build site with the Go to page link that includes the parsed placeholder key from the Content Objects form.
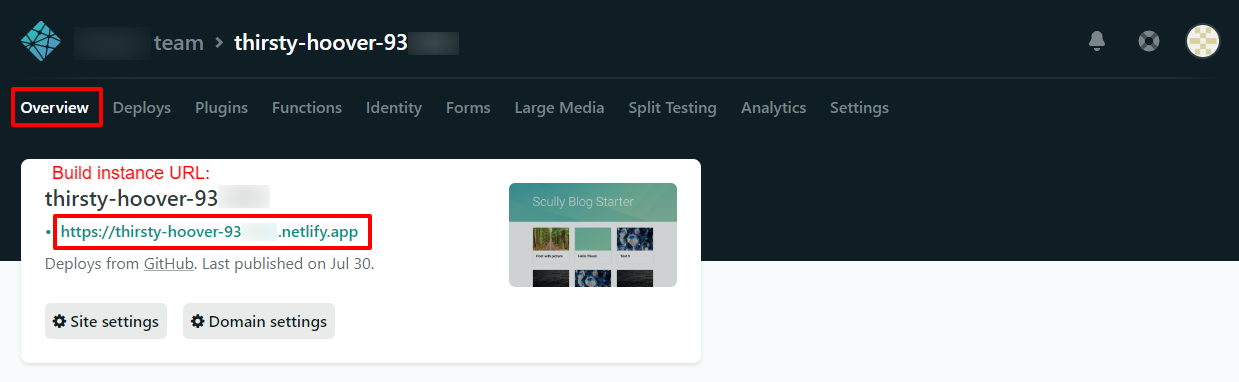
Configuring Netlify Build plugin
The two elements you will need to copy from Netlify is the Build instance URL:
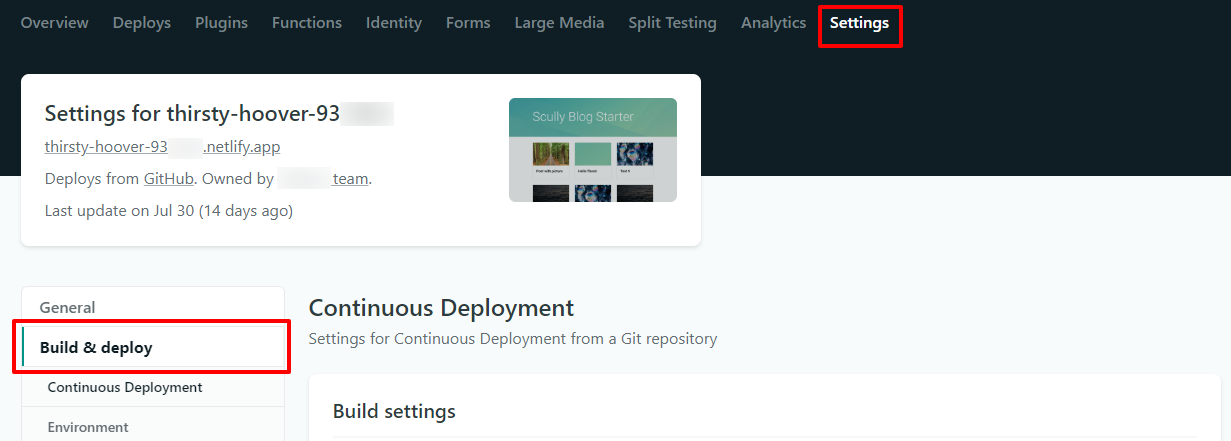
and the Builds Webhook URL from Settings:
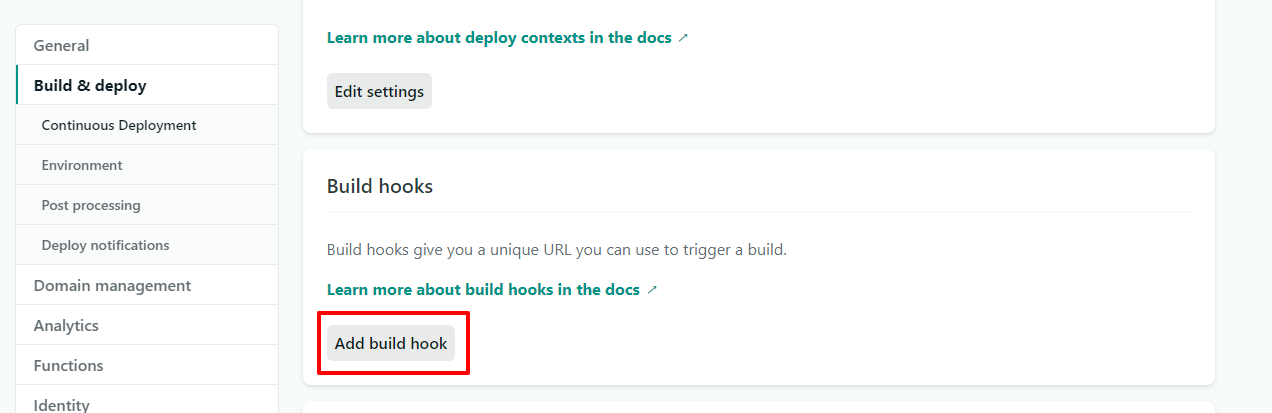
First, navigate to Settings → Build & deploy
Then scroll to Build hooks section, and click Add build hook button:
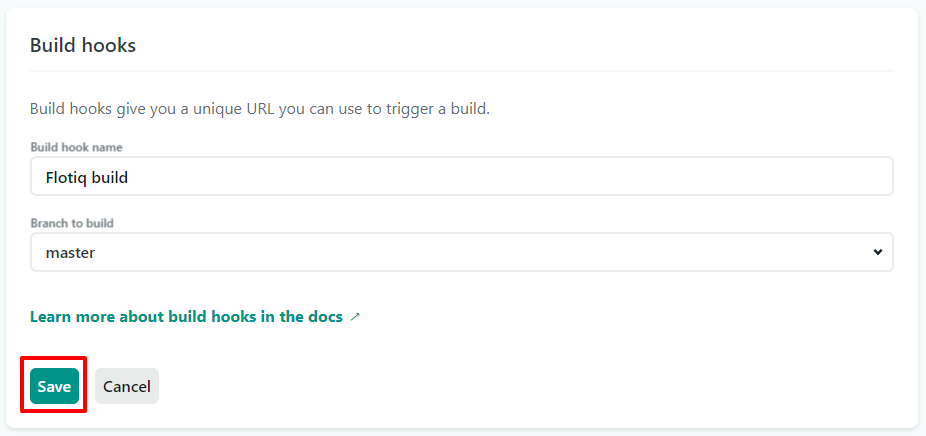
Put the name of your webhook (Flotiq build on this screen), choose branch (master here) and click the Save button:
Copy webhook URL:
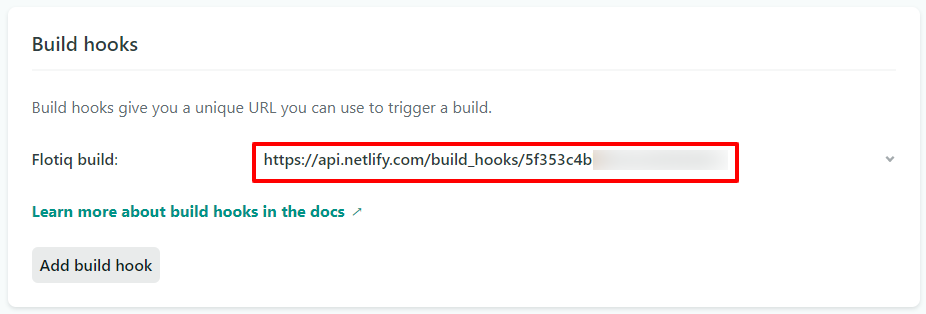
You will paste both of them in Flotiq Netlify Build plugin settings, don't forget to click the Save changes button.
That's it!
You're done. Now you will see Build site in Content Objects forms, and you will be able to build site after you made changes to the content.