Flotiq MCP Server in VS Code Copilot
This guide shows how to add the Flotiq MCP Server to GitHub Copilot Chat in Visual Studio Code.
Prerequisites
- Flotiq account
- Visual Studio Code with the GitHub Copilot Chat extension
- Copilot Chat running in Agent mode - MCP tools are not available in Ask mode
Setup
1. Add the server
Open the Command Palette (Cmd/Ctrl + Shift + P) and run MCP: Add Server.
- Choose HTTP as the server type
- Enter the URL:
https://mcp.flotiq.com/mcp - Enter
FlotiqMCPas the server name - Choose whether to store the configuration in your user settings or in the workspace
VS Code starts the Flotiq authorization flow automatically, where you pick the Space and the access scope.
2. Or edit mcp.json manually
Instead of using the Command Palette you can add the server to .vscode/mcp.json in your workspace:
{
  "servers": {
    "FlotiqMCP": {
      "type": "http",
      "url": "https://mcp.flotiq.com/mcp"
    }
  }
}
Check the configuration
In the Copilot Chat sidebar click the Tools icon. You should see all Flotiq tools listed under FlotiqMCP:
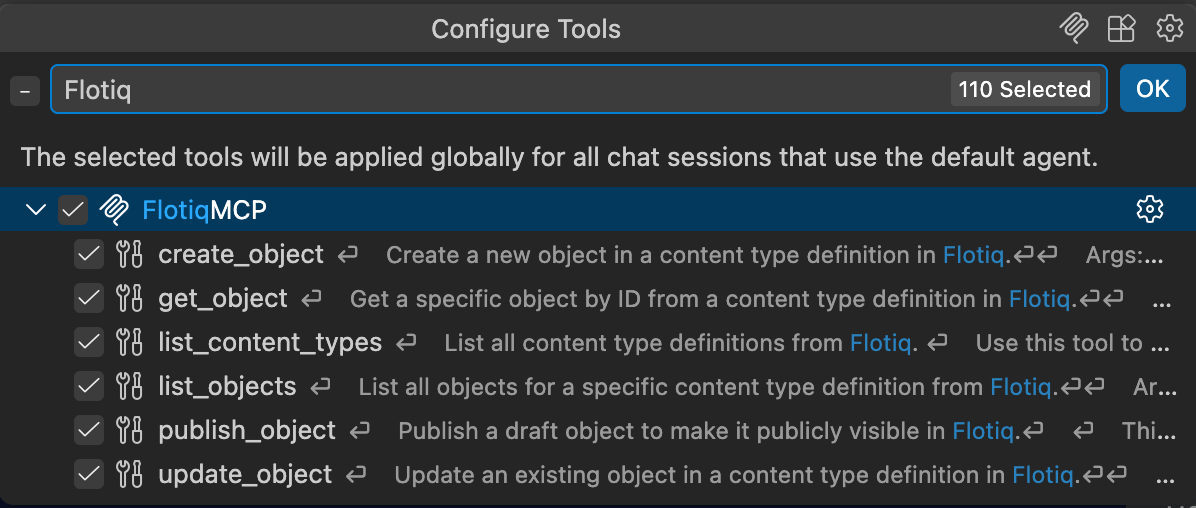
Leave only data_efficient_list_ctd, get_content_type, list_objects and get_object checked if you want Copilot
to work in read-only mode.
Note
If the OAuth flow does not start, or fails with a registration error, your VS Code version may not support Dynamic Client Registration. Update VS Code and the Copilot Chat extension, then remove and re-add the server.